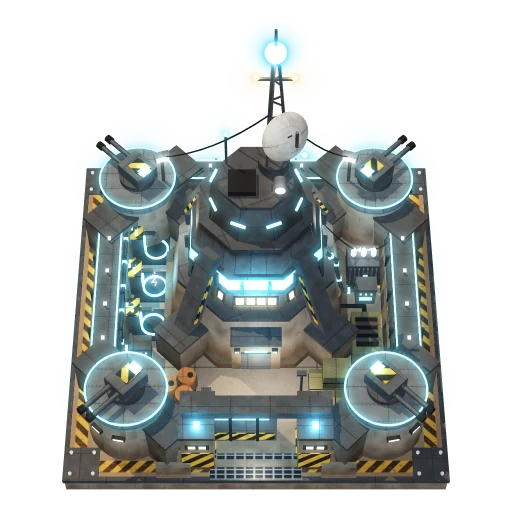
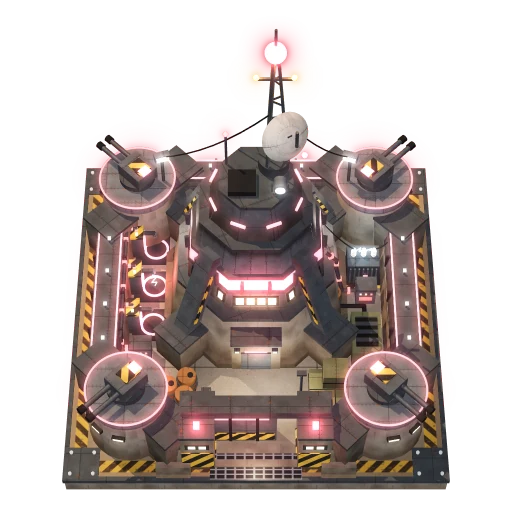
Two to four people, on any mix of phones, tablets and computers. The host gets a room code to give the others; computer rivals can fill the empty places.
Room code
Players
Game
Joining the game: getting it from the other players…
Paused
Boosts
Give yourself or a rival a hand: everything lands at the Command Base. Below, you can stop the rivals making a kind of unit.
Missions
Statistics
How to play
Touch controls
Move: drag with one finger. Zoom: pinch. Tap the minimap to jump.
Inspect: tap anything; drag its panel's handle up or down.
Build: tap Build, pick a card, tap a spot, tap it again to confirm.
Roads: in Paths one finger sketches and two fingers move the map; or tap Route to, then where the road should go.
Army: tap Army, pick an order, then tap a rival building or open ground.
Warbots: tap one to select it (again for all in view), then tap where to send them; Undo takes it back. Hold, then drag, to box several.
Back closes what's open, then pauses. The game saves itself.
The rest is below: pick a section.
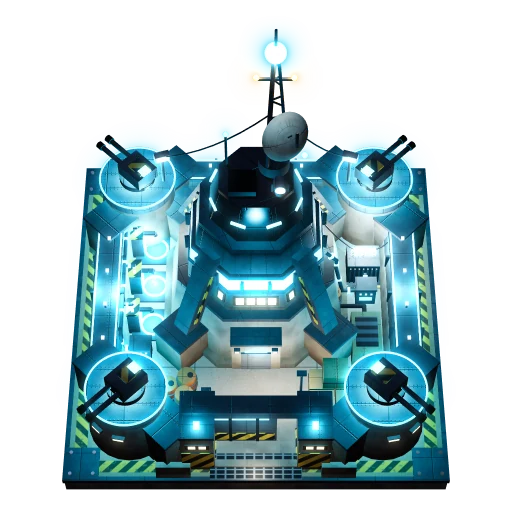
Your robots have landed on a small planet: gather its resources, link them into supply chains and grow your colony. Play Versus to race and fight rival colonies, or Colony to build at your own pace with no rival at all.
Getting started
Every game opens with a briefing card: who has landed where, the map, your rivals and the rules in play, under a line from your colony's own log (where you came down: see The story). The game waits, paused, while you read. The card closes by itself after a few seconds, or tap anywhere (or press any key) to start. In multiplayer it doesn't pause.
You land with a Command Base ringed by road, ten Workers, five Haulers, one Tanker and one Agribot (plus four Warbots in Versus), and 24 Cement, 16 Fiber, 8 Stone, 8 Alloy, 4 Chips, 4 Crystal and 10 Fuel. The Goal chip under the top bar walks you through your first steps. In short:
A Fuel Station first. Robots run on batteries, and your Command Base can't charge them. Tap Build (B), open the Move tab and place a Fuel Station beside the road ring round your base: it runs on the Fuel you landed with.
A Harvester (Gather tab) beside the teal stalk groves, for Fiber.
A road to it. Haulers only drive on roads. Tap the new site and choose Lay road, or tap Paths, drag a road from the ring to it and tap Build. Free Workers pave it.
A Quarry by the grey boulders for Stone, then a Cement Works near your base: nearly every building and every road is made of Cement.
An Ore Mine by the dark ore veins and a Crystal Tap by the violet crystals, then a Smelter (Ore and Fiber into Alloy) and a Chip Fab (Crystal and Alloy into Chips).
A Bot Foundry. Tap it and order a few Workers: it only builds what you ask for.
Then spread out: an Outpost near your border for more land, a Bio Farm on the dark fertile soil for Fuel, a traffic light on your first busy junction and, in Versus, an Ammo Plant so your warbots can reload.
Placing a building. Pick a card in the Build menu (tabs Gather, Make, Move, Defend and All). Good ground is highlighted, and the banner says what a spot would reach: groves in reach, fertile tiles, Crude in a seep. On a touch screen your first tap shows the building there; tap the same tile again, or press Build here, to place it. With a mouse a click places it at once. Cancel or Esc stops.
A placed building is a construction site. Haulers bring its materials by road and a free Worker builds it, but only as far as the goods delivered so far. Tap a site to see what has arrived and what it's waiting for: Waiting for materials, No road to storage yet or Waiting for a builder. You can have six sites going at once.
Tip: tap anything to see what it's doing. A red road badge means a building has no road; its resource shown crossed out means a gatherer has nothing left in reach.
Cement is your main building material: nearly every building costs some, and so does every road (1 Cement paves 5 tiles). A Cement Works bakes it from Stone, so build one early. Only the Quarry (2 Fiber) and the Cement Works itself (4 Stone, 2 Fiber) need none. Alloy is the scarce one: Chips, bots, bridges and every advanced building need it.
Harvester cuts teal stalk groves within 5 tiles into Fiber
Quarry breaks boulders within 5 tiles into Stone
Ore Mine digs dark ore veins within 4 tiles for Ore, two at a time (and green Uranium first, in a Nuclear race)
Crystal Tap mines violet clusters within 4 tiles for Crystal
Cement Works: 1 Stone → 2 Cement
Smelter: 2 Ore + 2 Fiber → 3 Alloy every 15 seconds: about 12 Alloy a minute from 8 Ore, so feed each one from two or three Ore Mines
Chip Fab: 1 Crystal + 1 Alloy → 1 Chip
Bot Foundry: 1 Alloy + 1 Chip for each round of parts (8 seconds) → any robot or road vehicle you order (ships, trains and planes come from their own yards)
Bio Farm grows energy crops on fertile soil into Fuel; an Oil Pump on an oil seep pumps Crude, and a Refinery turns 1 Crude into 1 Fuel
Asphalt Plant: 1 Crude + 1 Cement → 2 Asphalt, for the fastest roads
Ammo Plant: 1 Alloy + 1 Cement → 3 Ammo, whenever war is on (every Versus game, and Colony free play)
Fields and the frontier. Resources lie in separate fields with open ground between. Your landing zone has stalk groves, boulders, ore, crystal and fertile soil. The nearest oil seep lies just beyond your starting border, and Uranium (in a Nuclear race) mostly out towards the middle. Deposits get richer the further they are from the bases: a sparkling boulder, vein, cluster or seep holds up to 2.2 times as much, so the frontier is worth a long supply line.
Stone never runs out. When a Quarry's boulders are gone it keeps working: its worker cuts Stone from a cliff or crag in reach, or digs it out of the ground beside the Quarry, more slowly, and rests while you have 40 Stone or more. A Quarry still needs a boulder within 5 tiles to be placed at all, so build it where boulders and a cliff or crag are both in reach.
Fiber can be grown. Wild groves never grow back, but a Grove Planter (Gather tab; 1 Fiber, 2 Cement; run by an Agribot) plants new stalk groves within 4 tiles, so Fiber doesn't run out. Each grove is ripe in just over a minute, and a Harvester nearby that had run dry goes back to work.
Running out. When a Harvester, Ore Mine, Crystal Tap or Bio Farm has nothing left to work in reach, it shows its resource crossed out, frees its worker and tells you once: dismantle it and build a new one by a fresh field. If you ever run out of Stone or Fiber with nothing able to make more, your Command Base's crew salvages a little (1 every 20 seconds, up to 6), so you can always build your way back.
Stock limits. Tap a factory to set how much of its product to keep: at that it stops, takes no more inputs and its worker goes off to other jobs until it's needed. The Cement Works stops at 40, the Refinery and Oil Pump at 30, the Ammo Plant at 24, the Asphalt Plant at 20, the Chip Fab at 10 and the Missile Factory at 4 unless you change them (so Chips and Ammo don't eat the Alloy the Foundry needs). The Smelter has no limit unless you set one. Gatherers (Harvester, Quarry, Ore Mine, Crystal Tap), Grove Planters, Bio Farms and the Bot Foundry have none: pause them if their goods pile up.
Feed links. Put a factory right beside the building that makes what it uses and a short conveyor joins them (a pipe for Crude and Fuel): goods go straight across, one every 2 seconds, with no Hauler, and the factory fed that way works a tenth faster. An Ore Mine beside a Smelter beside a Chip Fab, a Quarry by a Cement Works, or a Refinery, Asphalt Plant and Roadworks in a row (the Refinery passes its Crude along) all work as blocks. Each building feeds at most two neighbours, and storage never takes part. While you place a building, green arrows show the links it would make. Packed blocks are efficient, but one missile or fuel blast hurts them all.
Goods. Tap a good's counter in the top bar (or press Y) to see how much you have, how fast it's made and used a minute, which buildings make and use it, and any shortfall.
Workers run buildings (one inside each production building), go out to cut, dig and mine, build sites, pave planned roads and patch up damaged buildings. They can go anywhere, but off the road they crawl at under half speed, except while out gathering for their building. Idle ones rest in the nearest storage. While any site is waiting, two Workers are kept free for building (one otherwise); when too few are free, the least useful building gives up its worker and you're told. Order more at the Foundry.
Haulers carry dry goods two at a time, and only drive on roads: a building with no road to storage gets nothing delivered and has nothing collected. A Hauler finishing a delivery takes the next short job beside it, so Haulers keep to their part of the colony. Once you have Freight Trucks, runs of 12 tiles or more go to them (see Long hauls) and Haulers keep to the short ones; Crude and Fuel go by Tanker, and feed links and Rail Station conveyors move goods with no Hauler at all. If every Hauler is lost, Workers carry goods, slowly, until you make more.
Specialists, all from the Bot Foundry:
Agribots are the only bots that run Bio Farms and Grove Planters. You land with one.
Pavers run the Roadworks. You land with none.
Tankers are the only road vehicles that carry Crude and Fuel, ten at a time (Haulers carry them one at a time only when no Tanker can get there). You land with one.
Freight Trucks (8 goods) and Road Trains (30) take the long runs, and Crawlers are bases on tracks (see Long hauls).
Warbots, Bulwarks and Torches whenever war is on (see Fighting and the army).
Ordering bots. The Bot Foundry (Make tab; 4 Cement, 3 Alloy, 1 Chip; run by a Worker) only builds what you order. Tap it: under Order bots each type has +1, +5 and Clear, and ▲▼ moves it up or down the build order; Take turns or Top of the list first chooses how the orders are worked through. Each round of parts is 1 Alloy and 1 Chip, 8 seconds' work:
one round: Workers, Haulers, Agribots, Pavers, Warbots
Ships, Freight Trains and planes come from the yards at Ports, Rail Stations and Airfields instead.
You can have up to 90 robots in Versus and 150 in Colony; at the limit the Foundry and yards stop.
Recycling. A robot you no longer need still fills a place under the limit. Tap it → Recycle this unit (Delete): it walks or drives to the nearest Bot Foundry and is taken apart there. Half of what it took to make (rounded down, Alloy first) goes into that Foundry's stock, and its place is free again:
1 Alloy for a Worker, Hauler, Agribot, Paver or Warbot; 1 Alloy and 1 Chip for a Freight Truck, Tanker or Torch; 2 Alloy and 1 Chip for a Bulwark; 2 and 2 for a Road Train; 3 and 3 for a Crawler (its goods are left in crates by the Foundry).
On its way it says Going to be recycled, and Keep this unit on its panel (or any other order) calls it off. If the Foundry is wrecked or captured first, it just stops where it is.
Selected warbots: Recycle these 3 units on the selection bar (tap it twice; Undo takes it back for a few seconds).
Your robots (U) counts your spare Workers: those past one for each building that takes a Worker (sites too) and 4 kept free for building. Recycle spare Workers sends them all, never one running a building.
Planes, ships and trains can't get to a Foundry, so they can't be recycled. Rivals scrap their own spare Workers and Haulers this way when the limit leaves no room for the army they want.
Batteries. Every bot runs on a battery that drains as it moves and works. Below 30% it goes to recharge once its job is done. Below 12% it's in emergency mode: half speed, and half the work or firepower. With nowhere to charge it carries on, slowly.
Bots charge at a Fuel Station (Move tab; 3 Cement, 1 Alloy; four at a time), a deployed Crawler (four) or a Drop Outpost (two), each burning the Fuel stored in it: one Fuel is two full charges.
Your Command Base doesn't charge them. Warbots also recharge in their garrisons, except the Command Base.
An empty station gets Fuel before any other delivery, and idle bots top up at one close by. Build more near busy areas, above all far from home.
Trucks, ships and planes have fuel tanks, not batteries: see Fuel, Crude and pipes.
Your robots. Tap the robot counter in the top bar (U) for every robot you have by type, what they're all doing and how near you are to the limit, your spare Workers (with Recycle spare Workers), Show buttons for your warbots, and Show workers on the map (see Views, statistics and settings).
Where you can build: on your own land, or on no-one's ground within 10 tiles of your buildings, roads or track, never on a rival's (see Land, influence and Outposts). A few rules keep the colony working:
Leave each building a side where a road can go.
Nothing goes on the tiles right round the Command Base: that's for its road ring.
A gatherer needs its resource in reach, a Bio Farm fertile soil, and an Oil Pump goes right on top of a seep.
A building can't block the only way through a gap, or wall in or cut off its neighbour.
Six sites at a time. Walls, Gates, Viaducts and Ramps don't count (they're paid straight from storage); moving a building does.
Priority. Tap a building to set it Low, Normal or High (any building but the Command Base and finished Walls and Gates). High buildings and sites get workers and goods first, Low ones last, and Low ones are the first to lose their worker when you're short. A site's priority is just for building it: the finished building goes back to Normal.
Panel buttons (on a computer they show their keys):
Pause / Resume sends the worker to other jobs and stops deliveries. Generators and some guns have Turn off instead: no Fuel or ammo burnt or brought.
Call a worker fetches the nearest Worker, even a busy one, to a building that has none.
Repair: buildings don't mend on their own (except Walls and Gates near a Keep, and anything once Nanite Repair is researched in Colony). Pay 1 Cement for every 6 armour up front and a free Worker walks over and patches it up.
Move is free. A site of the same kind goes up where you tap while the old building keeps working; when it's done the goods, settings, work in hand (a Silo's missile, a Foundry's parts), damage and stationed warbots move over and the old one comes down. It takes one of your six site slots, and Cancel move calls it off. The Command Base, Outposts, Keeps, Drop Outposts, deployed Crawlers, Walls, Gates, Ramps, Viaducts and Ropeways can't move.
Dismantle (tap twice, or Delete twice) leaves everything that went into it in crates on its tile, with whatever was inside (a Depot's whole stock, a Silo's Missiles), and your Haulers bring it all home. Cancelling a site leaves what was delivered the same way.
Crates. A building the enemy destroys is simply gone: only what was inside spills out as crates, and a wrecked site loses what was delivered. Your Haulers collect crates on your own land and on no-one's land (never a rival's) wherever their roads reach, as long as no enemy robot or gun is within 6 tiles. Freight Trucks take the big piles and Tankers the barrels of Crude or Fuel. Crates on no-one's land rot away after five minutes.
Storage. The Command Base, Depots, Ports, Airfields, Rail Stations, Drop Outposts and deployed Crawlers all store goods, and finished goods go to the nearest. Tap one to choose how it stores: Normal, Fill first (goods come here before anywhere else) or Empty out (it takes nothing new and sends its stock elsewhere), and switch single goods off under Goods kept here. The top-bar counters add up everything you have.
The dashed line is your border, and your land comes from what you build:
The Command Base holds 8 tiles round it, an Outpost 7, a Keep 6, a deployed Crawler 6, a Drop Outpost 4 and a Port founded by a Ferry 4.
Every other finished building holds the 2 tiles round itself, so your land grows as you build. Walls, Gates, Ramps and Bunkers claim nothing.
Where your bridge or Viaduct comes down on no-one's ground, the 3 tiles round its end become yours: room for an Outpost.
Beyond the border you can build on no-one's ground within 10 tiles of your buildings, roads or track: lay a road out and build along it. Defences (Pulse Turrets, Minigun Nests, Bunkers, Disruptors, Mortar Pits, Flak Guns, Keeps and both kinds of Silo) only go inside your own border. Outposts and Repair Stations don't need to, and Walls and Gates go anywhere on no-one's land your bots can reach.
Outposts (Defend tab; 4 Cement, 2 Fiber) are how you grow, in every mode: a wide ring of land that keeps your buildings in it from being cut off, with room for 10 warbots. They stand at least 4 tiles from your other forts, can't be moved, give up their land when dismantled, and can stand right on a road, which runs through for your own bots only.
Cut off. A fort's wide ring outranks an ordinary building's little one. If a rival's ring takes the ground under a building of yours, it's cut off (red wash, broken-link badge): it stops working and crumbles away over about a minute and a half, spilling its goods, unless you take the land back: once one of your own forts' rings (an Outpost, Keep, Crawler and so on) covers its tile again, it's yours and starts working again. No Outpost, Keep, Drop Outpost, deployed Crawler or Port a Ferry founds can go where its ring would land on a rival's buildings, so it happens when a fort is captured or falls. A site caught that way is lost at once.
Colony milestones. In Colony free play, claiming 10%, 25%, 40%, 60% and 80% of the land each brings a fanfare and a message. The clock shows your share, and the Goal chip your next milestone.
Roads are the heart of your colony. Every building that takes goods in or sends them out, and every site, needs a road joined to your Command Base's network (or to a Depot on it). A red road badge marks one with none: tap it and choose Lay road to pave the shortest way (with as few bends as it can: bots slow down for every corner).
Paths (R) is where you plan roads and everything like them: Roads, Bridges, Ramps, Viaducts, Ropeways, Pave, Arrows, Junctions, Walls, Rail and Pipes, plus Route to and the Traffic map. Sketch a road by dragging across the map, or tap tiles to add them (tap again to drop one). It shows bright blue, with its cost in the banner (at the top; on an upright phone across the bottom, in place of the tools, with How it works as a tab on its edge). Sketch up to the edge of the map and it scrolls on under your finger, so a long road is one stroke; on a touch screen two fingers move the map and zoom. Nothing is spent until you tap Build: Undo takes back the last drag and Clear wipes the sketch. Tap an existing road to mark it with a red cross to take up, Cement back. Planned by mistake? Drag along planned road (dashed, or still in your sketch) from one of its tiles and every planned tile you pass is called off when you tap Build, its cost back; drag from it out onto open ground instead and the road carries on from there. Rail works the same; built road is never touched by a drag.
Pay as you go. Short of Cement or Alloy? Plan it anyway: what you can't pay for yet waits, and is paid from storage as the goods come in, oldest plans first (a road tile still waiting has an orange outline). Planned tiles show dashed until free Workers pave them, about a second and a half a tile, working out from the roads you have. A long highway is a project: keep a few Workers free.
Roads double a bot's speed, and bots follow a road round its corners.
Dragging goes round resources; tap a boulder, grove, ore or crystal tile to clear it for a road, at three times the Cement.
An oil seep stays under a road (or track) and can still be pumped later.
An Outpost, Keep or Gate can stand on a road: your own bots drive through at full speed, and enemy bots have to break in.
Take up a road or bridge, or build across one, and the bots on their way along it look for another way at once; with none, a Hauler stops at the water's edge and puts its load down in crates.
Asphalt. A Roadworks (Move tab) with a Paver surfaces roads with asphalt, the fastest of all (2¾ times the speed on bare ground, against twice on plain road), using Asphalt from an Asphalt Plant: 1 Asphalt for 4 tiles. Pick Pave in Paths and drag along roads to mark them; your Roadworks pave the marked roads joined to them, nearest first, or every joined road if you choose that on its panel. Tap a road for its wear and a quick Mark button.
Wear. Asphalt wears as traffic drives over it: Freight Trucks and Tankers wear it three times as fast as a light bot, Road Trains eight times. Worn asphalt fades, cracks and slows bots a little, and worn right through it's plain road again. The Paver resurfaces marked roads once they're half worn, so a Roadworks near your busiest highways keeps them fast. Red outlines in Pave show worn asphalt.
Bridges and tunnels. No need to switch tools: drag a road out over water and it carries on as a bridge (2 Cement and half an Alloy a tile, 6 seconds' work), into rocky crags as a tunnel (3 Cement and 1 Alloy, 8 seconds), and over a chasm (the Rift, or the Fault line after its quake) as a Sky bridge (3 Cement and half an Alloy, 9 seconds). The Bridges tool plans them too. A bridge keeps one level all the way across and joins land on any level. On naval maps a bridge tile costs more the further it is from shore.
Ramps. Bots can't climb cliffs. Drag a road straight up a one-level cliff and a Ramp is planned where it climbs (3 Cement, 1 Fiber), or pick Ramps and tap the top or foot of the cliff. Ramps are paid from storage and don't count against the site limit; none climbs two levels at once. A Worker builds each from whichever side is the shorter trip.
Viaducts and Ropeways (Shift+V, Shift+Y) are Paths tools too, for cliffs too high for a Ramp: pick one and place it with two taps, the near end by your roads and then the far end (see Long hauls). The highlighted spots show where the near end can go. A sketch you haven't built yet waits while you place one: Cancel, or placing it, takes you back to it. Once built, tap a Viaduct's deck or a Ropeway's cable to open it (the end nearer your tap).
Outside your land roads, track and pipes go only over open ground on no-one's land; tunnels, and pipe across water or rock, need your own land. Road and rail bridges can push out over the water a tile at a time from your shore or the end of a bridge, so a channel inside the enemy's border can still be crossed.
Junctions, where three or four roads meet, slow bots as they cross and give way. Pick Junctions and tap one for a traffic light (1 Alloy): one direction at a time, switching when traffic waits the other way. Tap again for an overpass (4 Cement, 3 Alloy), only where four roads cross: one road passes over the other and nobody slows or waits, but nobody turns there either. Each road runs straight through, so bots that need to turn go round by another junction, and two roads that only meet at an overpass aren't joined. A T-junction takes only a light (the second tap clears it, and says why). Tap again to clear it. Measured with Haulers crossing both ways: a light costs a little with light traffic (about 5%) and moves 50 to 85% more in heavy traffic; an overpass moves the most where two through roads cross. Short of Alloy? Tap anyway: it's planned (a dashed orange marker) and goes up once paid for. Tap one of your roads (outside Paths) to see whether it's an overpass.
One-way roads. Pick Arrows and drag along a road to make it one-way; tap a road to turn its arrow. Undo turns them back, a drag or tap at a time. A drag that starts off your roads moves the map instead. A loop of one-way roads, one lane out and one back, keeps traffic flowing. Bots can still go the wrong way, but only at a crawl.
Traffic. Bots queue behind the bot ahead, keep to their own side of a two-way road (oncoming traffic slows them), and speed up and brake like real vehicles. Every stop costs time, above all for slow-starting trucks, so long straight roads, one-way loops, lights and overpasses pay off.
Route to (Z, on Roads, Bridges or Rail): tap a spot and the cheapest road (or track) there from your network is planned for you, round fields, up cliffs with a Ramp, over water or through rock only when that saves a long way round. Tap another spot to try again, or Build to keep it. Drag from one spot to another to route between them; with a mouse, a dashed line previews the way to the pointer.
Traffic map (T) tints every road by how busy it's been over the last minute, green to red, with pulsing rings where bots stand waiting. The banner shows a quiet/busy/packed key, the number of jams and how many Haulers, Freight Trucks and Tankers are busy.
Depots (Move tab; 3 Fiber, 2 Cement) are extra storage: Haulers drop goods at the nearest store, so Depots along your highways shorten trips. Give one supply orders to make it a forward base: tap it and use −5 / +5 to set how much of each good to keep there, up to 60. Cement, Fiber, Stone, Alloy and Fuel (and Ammo with war on) are listed first; More goods shows the rest. Sites, factories and garrisons nearby then draw on it. Ports, Rail Stations, Airfields, Drop Outposts and deployed Crawlers take supply orders too.
Who carries what:
Haulers (2 goods) do the short runs, under 12 tiles.
Freight Trucks (8 goods) take the long runs from any building: a far mine's output home, storage to a far factory (it gets a bigger delivery, so it runs dry less often), and storage to storage. Once you own a truck, Haulers take a long run only when the far building has run dry with no truck free.
Road Trains (30 goods, several kinds at once) pull two trailers. They take storage-to-storage runs of 12 tiles or more with a load of 18 or more: far Depots, Ports, Rail Stations, Airfields, Drop Outposts and Crawlers. They're also the only road vehicle that serves a Trade Terminal.
Tankers (10 Crude or Fuel) do every liquid run, near or far.
A far Depot stocks itself. Once you own a Road Train that can drive to a Depot 12 or more tiles from your Command Base, the Depot keeps what the factories, garrisons and sites within 9 tiles of it need (twice what each factory holds of its inputs, and what each site still lacks), once that adds up to a Road Train load (18 or more), and the Road Train brings it. Below that, trucks and Haulers serve them as usual. Tap the Depot to see what it keeps, or switch Auto supply off. Where you also set a supply order for a good, it keeps whichever is more.
Trunk runs. A Depot (or any other store) 12 or more tiles out sends home the goods nothing near it uses, by truck or Road Train but never by Hauler: a truck goes once a few are spare, or where a Road Train can get there they build up to 18 for it. Build one by a far mining field and its output comes home in bulk. A truck or Road Train that delivers somewhere far takes home whatever waits there, rather than drive back empty.
Trucks love asphalt. They're slow to start and slower than a Hauler on concrete, but fastest of all on asphalt. A Road Train on plain road crawls, wears the road and holds up the traffic behind it; on an asphalt highway one Road Train keeping a far Depot stocked does about the work of three Freight Trucks, on less Fuel. Idle trucks spread out to your Depots, ready for the long runs from there.
Which carrier? Measured feeding four Smelters 36 tiles from the Command Base: 8 Haulers alone kept them at about 40% of full output; three Freight Trucks at 70% on plain road and about 90% on asphalt; one Road Train stocking a Depot there, on asphalt, about 90% too; and a railway whose stations touched the Command Base and the Smelters at 100%, with no Hauler trips and no Fuel. Haulers stay best for everything under 12 tiles. Rail costs the most to build, trucks the least.
Ropeways (Paths → Ropeways, Shift+Y; 8 Cement, 6 Alloy): tap a spot by your roads for the near station, then the far end, 3 to 14 tiles away on clear ground no rival holds, straight across cliffs, water or rock. It's an ordinary site, so it counts towards your six; once it's built the cable goes across. Haulers, Workers, warbots and other light bots ride it as part of your roads, so a plateau with no slope can still be built on. Every truck (Freight Trucks, Tankers, Road Trains) and the Crawler is too heavy. Dismantling either station takes the whole Ropeway down.
Viaducts (Paths → Viaducts, Shift+V; 3 Cement for every tile spanned and 1 Alloy for every two, paid from storage as the goods come in): a level bridge straight across a valley, canyon or water between two clifftops. Tap a clifftop by your roads, then a highlighted far end in the same row or column, up to 12 tiles away and no more than 2 levels higher or lower, with everything between lower than both ends. A Worker builds it out from the near end. Everything drives across at fresh-asphalt speed, trucks and Road Trains included (and trains, with track laid onto both ends), while life below carries on. The far end can be on no-one's land or even a rival's: a bridgehead that stands while the near end is in your land. It's open to both sides, so enemy bots can cross your Viaduct too. With war on, a Vulcan Bomber can bomb its deck: each bomb takes 14 off the end nearer where it falls (or the other end, if that one's weaker), and an end has 24 armour, so two bombs bring the span down (one end falling takes the other).
Crawlers (six rounds of parts) are colossal tracked bases. Tap one and press Drive somewhere (G) and tap a spot: it rolls there slowly, no road needed, and deploys where it stops; or Deploy here (E). Deployed it's a store, a Fuel Station for four bots (burning its own Fuel) and an Outpost holding 6 tiles with room for 4 warbots. Pack up to move (M) takes everything in it along and gives up its land. It can't climb cliffs or cross water without a slope, Ramp or bridge, can't ride a Ropeway or Ferry, and doesn't stock itself like a far Depot: give it supply orders.
Track: pick Rail in Paths (N) and drag, on your land or no-one's: 1.5 Cement and a quarter of an Alloy a tile (so 20 tiles take 5 Alloy), refunded when you take it up. Over water it's a rail bridge (3 Cement, half an Alloy a tile; on naval maps more the further from shore), through crags a rail tunnel (3 Cement, 1 Alloy). It can't go on resources, except an oil seep, which stays underground.
Levels: track climbs one level at a time over a Ramp, like a road. Drag it across a one-level cliff and a Ramp is planned for it; trains slow on the grade. Lay track onto both ends of a Viaduct to cross a canyon.
Rail Stations (Move tab; 6 Cement, 2 Alloy) go beside the track at each end of a line, or first, on bare ground: drag rail from one station to the other and the track is laid up to each.
Freight Trains are ordered at a station's rail yard (tap it; five rounds of Alloy and Chips that Haulers bring) and roll out onto its track. Each carries 56 goods, several kinds at once, fast, with no traffic to wait for and no charging or Fuel.
Trains run the line by themselves (each station's Auto supply, on unless you switch it off). A far station stocks what the buildings round it need, the station nearest your Command Base keeps what the far ones want, and a train sets out once its load fills a good share of its wagons (sooner if the far station runs low), bringing the far station's spare goods home on the way back. Where you also set a supply order for a good, a station keeps whichever is more.
Station conveyors. Anything touching a Rail Station (any of the 8 tiles round it) is joined to it by conveyor, with no Hauler and no road needed: factories get their inputs and send off their output, sites are built, garrisons get Ammo, Pulse Turrets Crystal, Repair Stations Alloy and the Bot Foundry its parts, and a Command Base or Depot swaps stock with it. Other storage (Ports, Airfields) isn't joined, and Crude and Fuel never go by conveyor. So put the home station beside your Command Base and your far factories round the far station.
Where a road crosses the track, road bots stop for a passing train.
Armoured trains. Tap a train (or its button on a station's panel) and press Armor this train (6 Alloy, 3 Chips, 3 Crystal, from storage). At the next station it stops at, the yard fits plating (40 more hit points, 40% less damage), a pulse cannon for enemy robots and vehicles within 4½ tiles and a flak gun for enemy aircraft within 6, all running off the engine with no ammo.
Ports are for the naval maps: Islands, Lakes, Tidal flats, River delta and Four Isles. A Port (Move tab; 8 Cement, 3 Alloy) goes on the shore beside open water, and it's storage that Haulers serve like a Depot. Tap it to order ships at its shipyard (a round of Alloy and Chips every 8 seconds); each puts to sea from that Port.
Container Ships carry 40 goods, and Tanker Ships 40 Crude or Fuel, between your Ports on the same water. Give a far Port supply orders and ships keep it stocked, in loads of 8 or more (so order at least 10 of a good: an order of 5 never ships), and it sends its spare goods home. Give your home Port supply orders of 10 or more too: that's what goes out.
A Ferry runs a ferry line: tap a Port and pick another to run it to, and your robots and trucks take the ferry whenever it's the shorter way. Six seats: a Freight Truck or Tanker takes two, a Road Train three, and Crawlers can't ride. An island your ferry line reaches counts as joined to home.
Ships burn Fuel and fill up at a Port (each keeps a little for them), and they're mended in Port.
Your Ferry. A Ferry tied up at a Port is inside it: tap the Port and its Ships section has a button for it, and Sail out of the Port takes it onto the water. Tap the Ferry to Sail somewhere (with a mouse, right-click the water while its panel is open), Take warbots aboard, Put them ashore or send it Back to its line.
Founding a Port. A Ferry loads 12 Cement, 4 Alloy and up to 4 idle Workers at its Port, sails to an empty shore no rival holds and puts a Port up there, claiming the land up to 4 tiles round it. It then heads home, and runs a ferry line to the new Port only if its own Port had none.
Footholds. You can build on any island where you hold something: an Outpost, a Port, or a Drop Outpost dropped from the air. Out of a ferry's reach, Workers carry goods by hand between buildings close together.
Airfields (Move tab; 10 Cement, 4 Alloy) need a runway: 5 tiles of open, level ground in a straight line from the hangar, on your land or no-one's (not a rival's), with no road, track, deposit, Ramp or building on it. Its hangar builds a Cargo Plane (one per Airfield) from Alloy and Chips, which drops one load a flight by parachute:
a Drop Outpost (6 Cement, 3 Alloy) on open ground nobody else holds: a foothold that claims the land up to 4 tiles round it and holds 2 warbots, stores goods and charges 2 bots;
2 Workers, or with war on 2 Warbots, anywhere it can reach, the enemy's land too;
up to 8 goods for a place you supply by air.
Supply by air is on the panel of any finished building that holds goods (storage, garrisons, factories, Fuel Stations, Silos, the Roadworks, the Foundry) once you own an Airfield, but not on the Command Base or Airfields. A Drop Outpost has it on, and so does a site you place in its land (or the land of an Outpost you've switched to Supply by air) where no road or ferry line from home reaches: build a Missile Silo there and its materials and Missiles come by air. Storage supplied by air also gets what the buildings within 12 tiles of it need, and Workers carry it over by hand. The plane takes off down the runway, burns Fuel in the air and refuels when it lands. Plan your flights round the enemy's Flak Guns.
Aircraft Fuel. Flying is thirsty. A full tank lasts about 45 seconds in the air; a Cargo Plane's big tank takes 5 Fuel to fill (one Fuel fills a fifth of it), so a long round trip costs 4 to 6 Fuel, and a Vulcan Bomber's sortie takes 3 Fuel on top of what its tank burns. Each plane shows a pink fuel gauge above it, and in its panel. An Airfield keeps 12 Fuel for its planes, brought by Tanker: its panel shows what it holds and about how many flights that covers. A plane checks its range before it takes off, and waits at the Airfield, saying so, until the Fuel for the trip is there.
Neutral Trade Posts are gold landing pads on no-one's ground (gold diamonds on the minimap), placed fairly between the colonies: one more than there are colonies, or two in Colony, about 24 tiles out. Dock a Trade Terminal (Move tab, 3M; 12 Cement, 5 Alloy) within 2 tiles of a post, one per post, and lay a road (or track) out to it: it needn't be near your other buildings. Nobody owns a post, so it's a race, and a rival's land round a post keeps you out: an Outpost of yours beside one shuts the others out. Tap a post to see who has docked there.
Three contracts at a time, new ones every 5 minutes (one you've taken stays while it has lots left), up to three lots each. One reads, say, You give 30 Stone → you get 9 Alloy.
A lot is worth the same whatever the good: 60 Cement, 30 Stone or Fiber, 25 Ore or 20 Crystal. It pays in Ore, Crystal, Stone, Fiber, Alloy, Chips or Ammo (Ammo only with war on).
Alloy, Chips and Ammo are only ever bought. Cement only buys made goods (Alloy, Chips, Ammo), no contract sells a made good for its own ingredients (no Cement for Stone), and none trades a good down for a much cheaper one.
It pays 65% of what the goods are worth, so it never beats making them, plus 1.5% for every tile the post stands beyond 16 from your Command Base (up to a quarter more). Each lot of a good you sell fetches less for a while after.
One more contract always brings Fuel, at a steep price, about half the usual rate: You give 30 Stone → you get 6 Fuel (or 30 Fiber, whichever you have more to spare; up to 8 at a post far out). It's the way to Fuel for a colony with no oil and poor soil.
Tap Take on a contract and only the big carriers serve it: Road Trains bring the lot from your storage, from wherever holds 10 or more of the good (or Freight Trains, with track beside the Terminal), never Haulers or Freight Trucks. Once the whole lot is in, the trade goes through, and what it paid waits at the Terminal until a Road Train or train takes it home: you can't spend it before then. Fuel is a liquid, so a Tanker fetches the Fuel a contract pays, a load at a time (keep one that can reach the Terminal by road), or lay a pipeline from the Terminal to storage and it flows home on its own. It's how a big surplus buys the Ore or Crystal your land runs short of late in a game. Rivals dock when they run short of something, from about 20 minutes in (an Architect sooner), or from 10 once their Crystal runs short, and then they buy Crystal or Chips; a rival that has run dry of Fuel with no Bio Farm or oil to make it takes the Fuel contract (and docks for it, from 10 minutes).
Fuel keeps everything moving. Fuel Stations burn it to charge bots; trucks, ships and planes fill their tanks with it; and Generators, Disruptor Towers, the Missile Factory and Torches burn it too. Keep plenty coming.
Bio Farm (Gather tab; 2 Fiber, 2 Cement; run by an Agribot): plants energy crops on dark fertile soil within 3 tiles. Each ripens in under a minute and is harvested into 1 Fuel. Its Agribot keeps up with about 4 or 5 fertile tiles, so one farm a patch does it, two on a big one; two crowded onto a small patch share its soil. Roads and buildings on the soil leave less room to farm.
Oil Pump (Gather tab; 2 Cement, 2 Alloy), built right on an oil seep. Each seep holds a limited amount of Crude; when it runs dry the pump shows a crossed-out oil drop: dismantle it and pump another.
Refinery (Make tab; 4 Cement, 3 Alloy): 1 Crude → 1 Fuel. A Refinery stops at 30 Fuel (its stock limit); an Oil Pump keeps pumping until its seep runs dry, unless you set a stock limit in its panel.
Farmland burns for good. Napalm from a Vulcan Bomber, or a Torch's Scorch the earth, scorches fertile soil black: the crops on it burn, and no Bio Farm will ever grow anything there again (soil under a building is spared). A farm whose fields burn makes less Fuel, and none once they're all gone; it then says so and can be dismantled. Tap burned ground for its panel. A colony living on Bio Farm Fuel alone is exposed: an Oil Pump and Refinery, or farms on more than one patch, keep the Fuel coming. A rival that farms is open to the same.
Tankers. Crude and Fuel are liquids, and only Tankers carry them, ten at a time (Haulers carry them one at a time only where no Tanker can get there). You land with one; order more at the Foundry. A Tanker destroyed with a load explodes, hurting everything round it and setting off loaded Tankers nearby, and so does a Refinery that's destroyed (dismantling one is safe). Keep them away from the fighting.
Pipelines carry Crude and Fuel, up to 4 a second each, with no Tanker at all:
Crude flows from Oil Pumps to the Refineries and Asphalt Plants on the line, then into storage on it.
Fuel flows from Refineries, Bio Farms and storage to the Fuel Stations, Generators, Disruptor Towers and Missile Factory on the line, and from a Trade Terminal (what its Fuel contract paid) to them and to storage on the line. (Anything on a Fuel line that sits empty for 20 seconds gets a Tanker again.)
In Paths pick Pipes (K) and drag from a pump to a Refinery, or from storage or a Refinery to a Fuel Station or Generator: the pipe finds its own way. Or tap a building in Pipes, tap Pipe every Oil Pump, or use Pipe it to the Refinery on a pump's panel or Pipe Fuel to it on a Fuel user's.
Pipe costs 0.3 Cement a tile over ground, road and track, and 1.2 across water or through rock, which needs your own land. It's laid at once, with no Workers. Raids, missiles and blasts can break it, and it's relaid once it's paid for again.
Fuel tanks. Freight Trucks, Tankers and Road Trains fill up at any storage or Fuel Station holding Fuel (one Fuel a tank); with none anywhere they limp along at half speed. Ships fill up at a Port, and planes at their Airfield, which burn the most: a Cargo Plane's long round trip takes 4 to 6 Fuel, and a bomber sortie 3 on top of its tank (see Ports, ships and air freight).
No oil and poor soil? A Trade Terminal always offers one contract that brings Fuel, at a steep price (30 Stone or Fiber for about 6): see Bulk trade. A pipeline from the Terminal to storage brings it home without a Tanker.
Generators (Make tab; 3 Cement, 2 Alloy) burn a Fuel every 40 seconds, only while something in reach is working, to make every factory, Refinery, Oil Pump and Bot Foundry within 4 tiles work a third faster. Tap one (or start placing one) to see its amber ring, with a lightning badge on everything it powers.
Warbots, defences, Ammo and missiles are part of every Versus game and of Colony free play, where the enemy is the Murmur.
Warbots fight enemy robots and the Murmur, shoot their way into enemy forts to capture them, and wreck other enemy buildings. You start a Versus game with four; order more at the Foundry. Their guns are short-ranged and can't hit ships or aircraft. On the march they keep to the roads in single file, go round the reach of enemy guns when the way round is short, and spread out when they arrive. A warbot standing about in enemy land runs its battery down after 15 seconds, so raiders can't camp in your base for long.
Ammo. A warbot carries 10 shots, and each Ammo reloads 5. With none it can't fight at all: it leaves the fight to reload, and only armed warbots answer orders. On an attack it reloads at a garrison within 16 tiles and comes back, once (a Torch refills its tank the same way). They reload inside any garrison holding Ammo, which Haulers keep stocked from your Ammo Plant: the Command Base keeps 10 and a Drop Outpost or deployed Crawler 4; an Outpost, Bunker or Keep keeps 2 for each warbot inside (at least 2; up to 6, 4 and 12).
Garrisons. Every warbot belongs somewhere: the Command Base (room for 40) unless you station it elsewhere. An Outpost holds 10, a Keep 25 (6 of them fire from its gun slots), a deployed Crawler 4, and a Bunker or Drop Outpost 2. Its panel shows how many are inside and what kinds (Warbots, Bulwarks, Torches). A garrison shelters and reloads its warbots, recharges them (all but the Command Base), and they come out to defend it. Tap an Outpost (or Keep, Bunker, Drop Outpost or Crawler):
Station here (V), with the − / + count, brings warbots from the Command Base.
Keep here sets how many the Command Base keeps posted there, replacing any that are lost. In the Army panel, Every Outpost keeps 0 / 1 / 2 / 5 sets them all at once.
Send them back to the Command Base (C).
When enemies come near: Go out and fight (as it starts) sends them out at enemies close by (they let one go once it's 9 tiles from the fort) and back in once it's clear, and, while its own walls are quiet, out to defend your buildings under attack within 14 tiles; Hold inside keeps them in until you press Send them out to fight.
Make this the rally point for new warbots (Outposts and Keeps; one at a time, tap again to clear): new warbots, Bulwarks and Torches are stationed there, and any that don't fit wait beside it.
A Bunker has no Keep here, and Bunkers and Keeps have no When enemies come near: their warbots fire from cover instead. The Command Base always keeps at least one warbot. After a fight, an attack or repairs, a warbot goes back to its post.
The Army panel (Q) shows where all your warbots are. Pick a group size, 2, 4, 8 or All (1–4), then an order. Each tap on the map sends another group, until you tap Done:
Attack (Q): tap a rival building to attack it, or a robot to hunt it down (they come back once it's dead). Attacks on a building only draw on garrisons within 14 tiles of it; with none in reach, a rally flag is planted beside it instead: they attack it, and once it falls they carry off what spilled out and come home.
Hold ground (G): tap open ground and they plant a rally flag there and stand guard (outside rival land they take on enemies within about 6 tiles of the flag). Flags and hunts draw on any garrison your warbots can walk from.
Station (V): tap an Outpost, Keep or Bunker of yours.
Recall all (C) brings every warbot home (on a touch screen, tap it twice). In the field lists each flag and attack, with Show, +N (send more), Recall and Call back.
Tap a flag for its panel: Call them back (C), or send more with Send warbots. Tap a rival building itself for Send warbots (from garrisons within 14 tiles), Fire missile, Bomb it and Napalm. Warbots you move, station or call back march there without stopping to fight. A cut-off post, such as a Drop Outpost, only sends its warbots within 16 tiles of it.
Setting off together. When an attack or a flag draws warbots from several garrisons, the nearer ones wait (up to 45 seconds) before setting off, so the squad arrives together instead of in ones and twos; a message says how long. One that is shot at while it waits goes at once, and if the target falls in the meantime (to an ally, say), the ones still waiting drop it there and then. Hunts, and warbots you select and send yourself, go at once.
Walls in the way. When the warbots you send would have to shoot through enemy Walls, Gates or Outposts on their way and don't carry the shots to break them (counting one reload at a garrison near the wall, on an attack), a message warns you: send more, add Torches, or open the wall with a Missile first.
Capturing. Outposts, Keeps and Command Bases have to be captured, not knocked down: warbots shoot their way in. When a fort drops below a quarter of its armour, every armed warbot inside comes out to fight. Enemy bots can't walk through your Outposts (nor yours through theirs) without breaking in. Capturing an Outpost takes its land, and the enemy buildings its ring now covers are cut off.
Loot. When your warbots wreck a rival building with goods in it (a Depot above all), the goods spill out as crates. Each warbot nearby carries one back to your nearest Outpost or Command Base and goes back for more; Haulers take it on to storage. Any side's warbots can pick crates up, so the rival can win its goods back.
Raids. Warbots on a flag with nothing to fight first attack any enemy building within about 3 tiles. Then they tear up enemy road (junctions first) and cut enemy pipelines within 2½ tiles of the flag, wherever it stands: roads have owners on any land. Bridges and tunnels are too solid; only a Missile craters them. The rival raids you too, every few minutes, at your busiest road away from turrets and garrisons (its band pulls back when your warbots outnumber it): guard long highways, keep warbots in forward Outposts, re-lay wrecked road and build a second route for the important runs. If you farm, every other raid may come for the roads by your Bio Farms with a Torch along, which burns the soil round them for good.
Keeping clear. Your Workers, Haulers and trucks keep out of enemy gun reach and away from armed enemy warbots (and the Murmur, and an enemy armoured train's cannon): no jobs near them, routes round them, and a building under enemy guns stops work until the gun is destroyed or runs dry. Send warbots to drive the enemy off and the work picks up again.
Repairs. A Repair Station (Defend tab; 3 Cement, 2 Alloy) fixes damaged bots three at a time with Alloy that Haulers bring: one Alloy repairs 12 health, a whole warbot. Badly hurt Workers drop in on their own, warbots come when their garrison is quiet, and a warbot badly hurt in a fight (below 35%) pulls out for repairs, unless it stands in reach of an enemy gun (walking out through the guns would finish it). Buildings are repaired with Cement from their own panel.
Bulwarks and Torches (Bot Foundry) are ordered and led like warbots:
Bulwark (three rounds of parts; tough but slow): a purple shield across its front stops fire from ahead, for it and for your robots just behind it, until 50 damage wears it down; it comes back after a rest. Shells, bombs, missiles and fire from the side get round it, and a Disruptor's pulse drains it. Its blasters are weak (and need no Ammo): send it with warbots and it leads, the ones on the same attack or flag keeping behind its shield.
Torch (two rounds): sprays a short cone of fire that burns every enemy robot in it and eats through defences, Walls and Gates fastest of all. A tank is 12 seconds of fire, refilled (1 Fuel a tank) at any storage or Fuel Station of yours holding Fuel. It can't fire from a Bunker's or Keep's gun slots, and it explodes if destroyed with fuel aboard.
Scorch the earth (a Torch's panel, X; or Scorch the earth on the selection bar with Torches selected): tap a patch of fertile soil. The Torch walks there, stands beside it and sprays its whole tank into it, 3 seconds of fire, and the soil is burned for good: no Bio Farm grows crops there again (see Fuel, Crude and pipes). It takes a nearly full tank (90%, as after a refill), and afterwards it goes back to refill (1 Fuel). Several Torches take a patch each: the one you tapped and the nearest round it. Enemy robots standing on the patch are burned too. Your own soil can be burned the same way, to leave nothing for a rival about to take it.
The Build menu's Defend tab (4). The defences below all go inside your own border. Pulse Turrets, Minigun Nests, Mortar Pits and Flak Guns can be turned off from their panel: they hold fire and take no more ammo.
Pulse Turret (3 Cement, 3 Alloy; T): turns to aim and fires at enemy robots and the Murmur within 5 tiles, using Crystal as ammo (4 shots each). It hits ships too, but not aircraft.
Minigun Nest (2 Cement, 1 Alloy; G): cheap and short-ranged (3½ tiles). It spins up and hoses the nearest enemy robot in the open with tracer rounds; each hit pins it down (half speed, slower guns) for a moment. Best against swarms of workers, haulers and Scuttlers. Fires Ammo (60 rounds each).
Bunker (6 Cement, 2 Alloy; U): a pillbox for 2 warbots, who shoot enemy robots within 3½ tiles from behind its walls with their own Ammo and recharge inside; nothing can hit them until it falls. It claims no land, so it can go anywhere in your territory, even beside an Outpost or Gate. Shot down, its warbots walk out.
Disruptor Tower (4 Cement, 3 Alloy, 3 Crystal; Z): every 2½ seconds a pulse drains 10 battery from every enemy robot within 4½ tiles and jams their guns for 2 seconds. It kills nothing, so pair it with a gun. It burns 1 Fuel for every 4 pulses, only while enemies are near, and doesn't bother the Murmur.
Mortar Pit (5 Cement, 3 Alloy; M): lobs a shell every 5 seconds at enemy robots 3 to 10 tiles away, where they bunch up: 6 damage where it lands and 3 to the others within a tile and a half. It can't hit anything closer than 3 tiles, so cover it. One Ammo makes 3 shells.
Flak Gun (4 Cement, 3 Alloy; F): fills the sky round enemy aircraft out to 7 tiles with bursting shells. It can't hit anything on the ground. One Ammo makes 8 shells.
Keep (14 Cement, 6 Alloy, 2 Chips; K): a fortified base with a roof cannon firing Crystal out to 6 tiles, and room for 25 warbots, 6 of whom shoot from its gun slots, from cover, within 4 tiles (the rest recharge and reload inside, ready to march). It holds land like an Outpost, roads run through it, and it has to be captured: missiles and bombs can't take it below about a third. Keeps stand at least 16 tiles apart.
The Keep's aura. Within 7 tiles of a Keep your Walls and Gates take a third less damage and mend themselves once left alone for 8 seconds, and your Pulse Turrets, Minigun Nests, Bunkers, Mortar Pits, Flak Guns and Disruptor Towers reach a tile further and reload a fifth quicker, so they fire a quarter faster (the Keep's own cannon and slots don't). Tap it, or start placing one, to see its ring.
Walls and Gates. In Paths pick Walls (X) and drag a line. Each tile is a Wall (5 Cement), and where the line crosses a road or track a Gate goes (6 Cement, 2 Alloy). Tap a planned Wall to make it a Gate, or a finished one and choose Make it a Gate for 1 Cement and 2 Alloy more.
They're paid straight from storage (what you have now, the rest as it comes in), so no Hauler or road is needed, and free Workers put each one up. They go anywhere on no-one's land your bots can reach, outside the site limit.
Walls stop every bot, even a diagonal line of them. Your own bots drive through your Gates; enemy warbots have to go round or shoot their way through (a Wall takes 40 hits, a Gate 32, and a Missile knocks 24 off: two break one open), burning Ammo while your turrets pick them off. A wrecked Gate leaves its road behind.
Walls are best across a narrow pass, with turrets just behind.
The rival defends too. Beside a fort under attack it builds whichever of Minigun Nest, Bunker, Mortar Pit or Disruptor it has fewest of, and from about 10 minutes in it puts a Minigun Nest or Bunker by its front fort without waiting to be hit. Most rivals build a Keep about a quarter of an hour in (a Warden its first early, and up to three), put up Flak once you have an Airfield, and may wall the side that faces you. On Chokepoint maps the rival walls its end of the pass, from Medium up. From Medium up, when your army comes near its base it calls its warbots home and keeps about a third of them there (and a few in each Keep; a Salvager keeps its home guard thin). An army you park on its land, out of reach of its guns, gets a Mortar Pit put up to shell it (Normal and Hard, and a Warden on any level).
A Missile Factory (Make tab; 4 Cement, 4 Alloy, 2 Chips) builds a Missile from 2 Alloy, 1 Chip and 1 Fuel in 20 seconds, and Haulers load them into a Missile Silo (Defend tab; 5 Cement, 4 Alloy, 2 Chips), which holds two and fires up to 22 tiles. A Silo shows its missile only when one is loaded and ready.
To fire, tap your Silo and press Aim missile (F): its range shows as a red ring. Tap a spot inside (a rival building, or ground where enemy warbots gather) to see the blast, then Fire. On a touch screen the map stays close enough to aim with a finger: move it to the target, tap to drop the crosshair, drag the crosshair to adjust, then Fire (a second tap doesn't fire). A bomber's strike and a Howitzer's target are picked the same way: tap the target, then the banner's Strike or Bombard. Or tap a rival building itself and press Fire missile (F): your nearest ready Silo in range fires.
A hit takes 24 armour off the target, damages buildings and bots within about 2 tiles, and craters the roads and pipes where it lands, bridges and tunnels included. That wrecks an Outpost, a Drop Outpost and most other buildings outright. A Bunker at full armour is left with 8, and Walls and Gates take two Missiles (more near their owner's Keep, which shields and mends them). Only Command Bases and Keeps are floored at about a third: warbots still have to capture them.
Dust storms ground every missile. The rival saves up for them too and aims at turrets, Silos and Outposts, so spread out and keep your turrets covered.
Nuclear race (a new-game option, on by default): a few single deposits of glowing green Uranium lie out across the planet: whoever holds them can build the bomb first.
An Ore Mine within 4 tiles of a deposit digs it before any ore.
A Nuclear Reactor (Make tab; 6 Cement, 6 Alloy, 3 Chips) enriches it: 2 Uranium make 1 Enriched Uranium.
A Nuclear Silo (Defend tab; 8 Cement, 6 Alloy, 4 Chips) builds one nuclear missile at a time from 6 Enriched Uranium, 4 Alloy and 2 Chips, a minute's work once the parts are in: 12 Uranium a bomb. Rivals are told when one is finished.
Tap the Silo and press Aim nuclear missile: its 40-tile range shows. Tap a spot to see the 6-tile blast, then Launch. It takes 30 seconds to land, and the target is warned at once, with the blast ring on their map and a Nuclear missile incoming card. Press Evacuate on it and every robot in the ring, garrisons and workers inside buildings included, runs out to safe ground until it's over. Everything inside is wiped out: buildings, robots, roads and pipes, yours included. The ground stays scorched for 4 minutes, and nothing can be built or laid on it until it cools.
A Command Base caught in the blast keeps 1 armour and loses its garrison. But a nuclear missile that lands within 2 tiles of a Command Base destroys it outright and knocks that colony out of the game, and everything it had left goes to whoever fired. The rival aims for Command Bases, so watch for that card.
Vulcan Bombers (with war on): an Airfield's hangar builds two, beside its Cargo Plane (five rounds of parts each). Parked, one waits at the head of the runway and the rest are in the hangar. Send one:
from the Airfield's panel (Strike by a bomber), or the Army panel's Air tab (X, then Strike: tap a target, E);
or tap an enemy building, or a truck, Tanker, ship or robot out in the open, and press Bomb it (Z); a building's panel also has Napalm (N), and so does a rival's fertile soil (Napalm it).
Bomb or Napalm. Picking its target on the map, the banner's Payload switch (B or N) chooses what it carries. Napalm takes no Ammo but 3 more Fuel at the Airfield (6 on top of its tank in all), and can be aimed at any ground in reach, not just a target: tap it (under a finger, tap and then Napalm). Where it lands, the tile and the eight round it (1½ tiles) burn for 6 seconds, hurting enemy robots and buildings there a little, and every patch of fertile soil in it is scorched for good, its crops with it: no Bio Farm grows anything there again. A rival that gets its Fuel from Bio Farms runs dry. While you aim, the fertile soil it would burn shows in amber.
Picking its target on the map, you can also tap the deck of an enemy Viaduct (or a Ropeway's cable, for its nearer station). The bomb falls where you tapped and counts against the whole span: 14 off the end nearer it, or off the other end if that one's weaker. An end has 24 armour, so two bombs anywhere on the deck bring it down, and one end falling takes the other.
It loads 6 Ammo and 3 Fuel at its Airfield, on top of the Fuel its tank needs for the trip (it can't take off without them, and its panel says what it's waiting for), flies out (chasing a moving target), drops one heavy bomb and flies home to rearm, which takes 25 seconds. The bomb knocks 14 off a building (Command Bases and Keeps no lower than about a third) and hurts what's round it, and a Tanker it hits explodes. Send two at one target and the second, if the first will finish it, brings its bomb home.
Flak Guns are the answer: a plane gets through one quick pass hurt, but not circling over a few of them. While enemy bombers are in the air coming for you, an air raid siren wails. A rival other than a Warden builds an Airfield late in a war (about 22 minutes in), with one more Bio Farm or Refinery to keep its planes in Fuel, and sends a bomber now and then at something valuable that no Flak covers. If you live on Bio Farm Fuel (two farms or more and no Oil Pump), it may napalm your farmland instead, every eight minutes at most, while its own Fuel lasts.
Beach landings. From a Port's panel a Ferry can land warbots: choose how many (up to six), press Choose the beach and tap any shore it can sail to, the rival's too; they hold the beach under a rally flag. With a mouse you can also select warbots and right-click the Ferry to have them board. A Ferry sunk with warbots aboard takes them down with it. The rival makes landings too.
Sinking ships. Pulse Turrets, Bunkers, Minigun Nests, Keeps, Mortar Pits, Missiles and Vulcan Bombers can sink ships; warbots can't shoot at them. A Tanker Ship sunk with a load explodes.
Armoured trains (see Freight rail) carry their own pulse cannon and flak gun, and your Workers and Haulers keep clear of an enemy one's cannon.
Rival on the new-game screen sets how strong the computer plays:
Easy: works at 70% speed, one site at a time, and attacks late.
Medium: between Easy and Normal, with later, smaller attacks and fewer raids.
Normal: the full game.
Hard: works 30% faster, lands with 6 more of every good, and attacks early and often.
Rival doctrine picks how the computer plays. Every rival Command has spent decades reading the last order from home (Hold position. Further instructions to follow.) and each settled into a doctrine (the old style word in brackets):
Steward (balanced; the usual): builds up, defends and attacks in good measure. A fair first opponent.
Warden (turtle): walls its base in, keeps adding turrets (up to six) and Keeps (up to three), and comes late with a big army. Out-grow it, then break in with Torches, Bulwarks and Missiles.
Salvager (raider): sends small bands to tear up your supply roads, again and again, from early on, keeping few warbots at home. Guard your roads.
Herald (rusher): comes for you early, before its economy is big: get turrets and garrisons up fast and it runs short.
Architect (tycoon): builds a big economy first (its bots work faster), then rains Missiles on you, and races for the bomb in a Nuclear race. Hit it before its Silos are ready.
Random gives each rival a doctrine no other rival has. Point at a doctrine on the new-game screen to read in depth how it plays and where it is weak; on a touch screen, tap it (or How it plays under the doctrines). With You vs 2 or You vs 3, Each rival sets one for each computer colony (its colour beside it), so you can mix them; the doctrine buttons set them all at once (while the rivals have doctrines of their own, a first tap on a touch screen only shows that doctrine, and a second tap gives it to them all). The briefing card and each rival's Command Base panel tell you which you face, and a rival speaks in its doctrine's voice now and then: when it attacks you, when it fires a Missile at you, and when it surrenders.
Rivals respect your defences. Before it attacks, a rival counts the defences covering its target: Pulse Turrets, Minigun Nests, Bunkers, Mortar Pits, Disruptor Towers, Keeps, and garrisons close enough to come out. It sends enough warbots to beat them, or puts a Bulwark at their head, and goes for the gun first; if it can't, it goes for something less well guarded, or waits, builds a Bulwark and shells, bombs or fires Missiles at the spot. Its raids keep out of your guns' reach, so a Minigun Nest by a road guards it too.
How rivals fight. From Medium up a rival masses its army before it marches, on whichever of your forts takes the fewest to beat, and leaves a place where it was just beaten alone for a while. With a big lead in warbots it gathers up to 30 out of reach of your guns, then storms your Command Base, the guns round it first. A Warden marches only in one big push, from about 22 minutes (sooner with a big lead); a Salvager's bands gather just outside your land, then strike the road by your busiest buildings, and its attacks go for buildings your colony lives on; an Architect's Missiles go at what your colony lives on, and into an army at its gates.
Callsigns. Each colony goes by the callsign the Accord gave its colour: COBALT (blue, yours in single player), VERMILION (red), VIRIDIAN (green) and TYRIAN (purple). Messages, panels, statistics and the end screen name rivals that way (with the colour where it helps you find them, as in VERMILION (red) to the north); in multiplayer people go by their names. Any callsign can run any doctrine.
Ways to win (Victory on the new-game screen):
Capture (the usual): take a rival's Command Base and everything it built is yours (its robots shut down). The last colony standing wins, and losing your own Command Base ends your game.
Domination: hold most of the land anyone holds (60% with one rival, half with two, 45% with three, and at least a fifth of the planet) for 3 minutes straight. A card under the top bar shows where everyone stands; Outposts and Keeps claim the most land.
Uplinks: 3 to 5 neutral relay towers (ringed dots on the minimap) belong to whoever's land they stand in. Once they come online, 8 minutes in, hold at least half of them, and more than anyone else, for a total of 5 minutes. Armed enemy warbots right beside an Uplink jam it, and its panel has Hold it with warbots.
Whichever you pick, a computer rival that has clearly lost surrenders to the colony beating it (the one that last hit it, or else the strongest), which takes everything it had: after 12 minutes of play, once it's down to 40% of its best against a colony four times as strong (or has nothing left to rebuild with) for about 40 seconds. Never in missions.
Keep playing. Won a game against the computer and want more? The victory screen's Keep playing carries on with the same map: rivals still standing fight on (and no longer surrender), Domination and the Uplinks stop counting, and nothing ends it but leaving, or losing your own colony. Not in multiplayer or missions.
Free-for-all.Players: You vs 2 puts you against two rivals, who fight each other as well as you; You vs 3 adds a fourth colony. The badges in the map picker show which maps take three or four. When you capture a rival's base mid-game its colony is yours, but a captured Command Base keeps its own roads: until you join them to yours by road, goods don't cross between the two.
Teams. With You vs 3, Teams: 2 vs 2 makes the red colony to your north (VERMILION) your ally against the other two (on Long Haul 2v2, where it starts on, red lands beside you at the south end and the other team at the far north end). Allies never fight each other, and the computer only goes after the other team. A team game is won by Capture: take both enemy Command Bases and you both win. In multiplayer the host sets the teams in the lobby.
Winning too easily, or not at all? Tap the clock three times quickly (or press `) for the hidden Boosts menu (single player only; the game pauses while it's open). Give yourself or any rival a supply drop of goods, 4 armed Warbots (with war on), 3 Workers or 3 Haulers at its Command Base. Under Rivals can't build you can stop every rival making Warbots, Bulwarks, Torches, Vulcan Bombers or Ferries for the rest of the game.
Colony mode has no rival: build and spread at your own pace, on a Huge map unless you pick another size, with room for 150 robots. The clock shows how much of the land you hold, milestones mark your progress, and the game never ends. Colony free play has every building, warbots and missiles too, to try out at your leisure.
The Murmur (a Colony option, on by default): the planet's native creatures, which live underground. Their nests sit out in the wilds, shown red on the minimap. From about 7 minutes in, each sends a pack every five minutes or so at whatever you've built within about 24 tiles of it. None on Argos: the moon is silent ground, so the switch is off there (no nests, no raids).
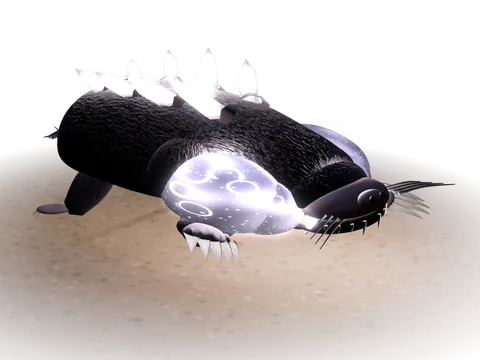
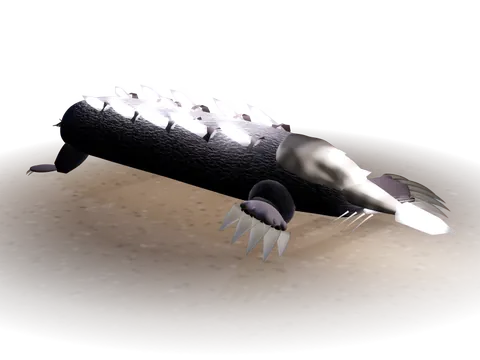
Scuttlers (quick and small) go for any bot caught in the open.
From a nest's second level, Brutes (big and armoured) tear up roads, batter buildings and slowly break through Walls and Gates.
The Murmur never wreck a finished building other than a Wall or Gate (they can wreck sites), but every bot they kill costs Alloy and Chips to replace. Nests grow over time (up to level 3), and packs grow with your colony.
Pulse Turrets and Minigun Nests shoot the Murmur on sight, garrisons send their warbots out at them, and a Repair Station mends robots they've mauled. To clear a nest, build an Outpost within reach, fill it with armed warbots and tap the nest to attack it (or hold a flag beside it). Its guards fight back; once it falls, the goods it hoarded spill out for your warbots to carry home. Nothing can be built within 2 tiles of a nest.
Research (Colony only): a Research Lab (Make tab; 6 Cement, 4 Alloy, 2 Chips) works on one upgrade for your whole colony at a time. Tap it and pick one: the Chips, Crystal and Alloy come out of storage at once and its worker does the research. Cancel gives the cost back, and a second Lab makes it twice as fast.
Long-life Cells: batteries drain 30% slower (and trucks, ships and planes burn 30% less Fuel), and Fuel Stations charge 50% faster.
Rapid Paving: roads, bridges and tunnels take 40% less time to lay.
Sentry Optics: Pulse Turrets reach 1.5 tiles further and get 6 shots from each Crystal.
Turbo Motors: every bot 15% faster. Power Tools: all work 15% faster. Nanite Repair: bots and buildings slowly mend themselves.
Planetary events (a new-game Rule in Versus, Colony and multiplayer; off by default): every five to eight minutes the planet throws something at every colony alike. A card under the top bar shows what's coming, with a countdown; most come with a 20-second warning.
Dust storm (1 to 1½ minutes): every bot moves at two-thirds speed, and no missile, nuclear or not, can be fired until it blows over.
Ringfall (30 seconds): a meteor shower, pieces of the planet's Ring falling on marked spots, the same spots on every colony's side. They crater roads (your Workers re-lay them if you have the Cement), dent buildings and bots nearby without wrecking them, and leave a rich deposit of Ore or Crystal behind (sometimes Uranium).
Solar flare (45 to 60 seconds): batteries drain twice as fast, so keep the Fuel Stations in Fuel.
The Wren (75 seconds): the Accord's automated supply ship, a trader in orbit, offers to swap some of a good you have plenty of for the Ore, Crystal, Stone or Crude your land is closest to running out of, at a good rate. Tap Trade on the card; the goods land in your Command Base. Its card also shows its cargo list, which is 31 years out of date.
Custom Game on the main menu opens the new-game screen, with a live preview of the exact planet your settings make.
Map type opens a picker: cards grouped Open ground, Divided, Water and Heights and depths, each with a sketch and badges for how many players it takes and Naval (Ports and ships). Random picks one with room for your players when you land.
Size: Small, Medium, Large or Huge (Versus starts on Medium, Colony on Huge).
Terrain: Flat, Gentle, Rolling, Rugged or Mountainous. More levels mean more cliffs and fewer slopes; some map types set their own.
Resources: Scarce, Sparse, Normal, Rich or Abundant: how many fields there are and how much each holds.
Biome (or Random): the planet's look.
Every planet has a number. New planet rolls another; Save keeps one you like under Saved planets to play again (the pause menu has Save this planet too).
The map types. On most of them, a Versus game's briefing card adds a tip for playing it.
Standard: open ground with hills, cliffs and fields between the bases. Long haul: a narrow planet with the bases far apart, built for long supply lines. Oases: a barren waste with a few rich oases joined by narrow passes.
Chokepoint: a belt of crags across the middle with one to three narrow channels, different every game. Rift: a chasm crossed only by a few rock arches (a Sky bridge opens another way). Ring valley: a massif too steep to climb, with a valley round each side; a long tunnel is the only shortcut. Canyon maze: narrow canyons with riches in the dead ends.
Crossroads: four quarters split by ridges, meeting at a rich plaza; with two players two rich quarters are free, and it takes up to four. Fault line: a scar across the middle that an earthquake splits into a chasm about 15 minutes in (with tremors first), swallowing what stands on it and leaving two rock arches.
Islands: each base on its own island, with medium islands and islets between, a wide sea apart. Lakes: many small lakes, roads weaving between them. Tidal flats: low islands joined by sandbars, dry at low tide and under the sea at high tide (low for the first 5 minutes, then they take turns, with a warning); bots walk across at low tide, anything caught out there is washed ashore, and nothing can be built on the flats. River delta: a braided river across the planet whose shallow fords Workers and warbots wade at under half speed; Haulers, trucks and trains need a bridge.
Crater: the richest fields (and Uranium) on a sunken crater floor, one ramp down on each side. Plateaus: each base on a high plateau with only two slopes down. Sky islands: mesas over a canyon floor far below, with no slopes down: cross with Viaducts (a Ropeway reaches the floor); deposits on the mesas hold almost twice as much. Volcano: lava rivers and the richest deposits on its slopes; from about 7 minutes in it erupts every five to seven minutes, rumbling first, and its lava bombs dent buildings and hurt bots.
For three or four players only: The Wheel (three: rock spokes, a raised rich hub and a rim road), Three Mesas (three: a tall mesa each above a rich basin, with canyons a Viaduct can span), Pinwheel (three or four: curved ridges round a rich plaza), Four Isles (three or four: an island each round a rich middle island with the Trade Post; in 2 vs 2 a sandbar joins allies), Twin Valleys (four, made for 2 vs 2: two valleys split by a mountain spine with two passes) and Long Haul 2v2 (four, made for 2 vs 2: the Long haul planet made wider and standing upright, two colonies side by side at each end, the richest fields strung along the long middle, a Trade Post on a plaza at the very centre and the others in pairs down the middle line or out at its flanks; picking it turns Teams: 2 vs 2 on, and you can turn it off for a free-for-all of four).
The naval maps, with Ports and ships, are Islands, Lakes, Tidal flats, River delta and Four Isles. On Islands, Sky islands, Tidal flats and Four Isles your home island also has a good store of Stone near the base (300 at Rich resources, less on sparser settings), so you can make Cement for a while before you have to cross.
High ground. The planet has levels, and lighter ground is higher, on the map and the minimap. Bots can't climb cliffs: they use the natural slopes (slower, unless paved) or the Ramps you cut (see Roads and traffic). Warbots on a clifftop can shoot across a narrow canyon (up to about 3½ tiles) at enemies on the far side.
Biomes are the regions of Ithaca I, each with its kind of ground under its name: the Rust (red desert), Greenreach (forest), the White (polar snow), Emberwood (autumn forest), the Long Grass (savanna), the Sump (swamp), Cinderlands (volcanic ashlands, where the water glows like lava), the Bloom (alien bloom) and Argos, Ithaca I's moon. They change the scenery, weather and sounds only (plants never get in the way, and a road or building clears the plants on its tile), with one exception: no Murmur live on Argos.
Rules on the new-game screen: Nuclear race (on by default), The Murmur (Colony; never on Argos, the moon), Planetary events (off by default), Weather, Time of day and Unlimited resources, for trying things out: it keeps your Command Base stocked with 500 of every good and gives your sites, factories, chargers and garrisons whatever they're waiting for, while rivals play as usual.
The planet is Ithaca I. Four robot vanguards were sent here to make it ready for colonists, and each game is one more landing, a terrafall: a Command Base dropped from orbit, run by a Command intelligence. That's you. The story stays in the margins; nothing in it changes how the game plays.
Your colony's log. Your Command AI has a few dry lines of its own: on the briefing card when you land (with the region you came down in, such as the Rust or Argos, the moon), at your first road, the first nightfall, your first Uplink, when you take a rival's Command Base, and on the end screen. Each is said once (they keep quiet in missions, which have their own words). In the message list they're in italics.
Callsigns and voices. Rivals go by their callsigns, and a computer rival now and then speaks in its doctrine's voice, under its callsign (see Rivals, teams and victory).
Panels. Every building's and robot's panel ends with a line from the archives, in small italics under everything useful. The Command Base's is its Arrival clock: T+31 years, still counting.
Planet events have their names on Ithaca I: Ringfall (pieces of the planet's Ring) and the Wren, the supply ship with its old cargo lists. The creatures of Colony mode are the Murmur, who live in nests (see Colony extras).
The loading screen shows a different line each time.
Lore, the small button at the foot of the main menu, opens the colony's archive: the whole story, a page at a time, with pictures of Ithaca I, its regions, the four vanguards' Command Bases, the neutral ground and the Murmur. Pick a page in the list at the top or turn them with Previous and Next (or ←→); Back closes it (or Esc).
Missions (on the main menu) are the tutorial campaign: hand-made planets, each with its own goals, that teach the game a step at a time, from your very first building to all-out war. Play them in order to learn (the first one you haven't finished is marked Next up), or pick any you like: every mission is open from the start.
They come in chapters, each building on the last: First Steps (your first building and road, Stone and Cement, batteries, the first Alloy), Growing the Colony (bots, farmed Fuel, regrowing groves, Outposts), Roads and Traffic, Industry and Trade and Sea and Sky, all in peace, then First Contact (the Murmur's nests and your first rivals) and War.
Each mission teaches one new idea. From the second one on you land with the colony the earlier missions taught already built and joined up, so you can get straight to it.
Each has three difficulty levels. Easy lands you with more in the Command Base; Hard gives you less, bigger goals, a tougher rival and (on most) a time limit.
Under the difficulty a line describes the planet: the map type, its size and terrain, the rival (and its doctrine, or passive if it never attacks), anything switched on such as the Murmur, Planet events or a Nuclear race, and the time limit.
The briefing card sets the scene and says how to start on the first goal.
The Goal chip lists the goals with your progress and marks the one to do next (▸), with a hint for it, while the buttons it needs light up (or the button that opens them, such as Build; for a button in a building's panel, a ring pulses on the building to tap). Each goal you meet is ticked off with a message and the next one's hint. Once a building the goal asks for is going up, the hint says so and nothing lights until it's built (or, if its site has no road, its Lay road lights).
Taking the (last) rival Command Base ends the game, so it waits for the rest: while any other goal is unfinished, that base holds at 1 armor (its panel says Finish your other goals first).
Finishing a mission ticks it off at that difficulty, and the end screen offers the next mission or another go.
Play against friends: two to four people, on any mix of phones, tablets and computers. Tap Multiplayer on the main menu and type your name.
Host a game gets you a room code to give the others (Share sends or copies a link that opens the game with the code filled in: they just tap Join). They type the code and tap Join.
The lobby lists everyone, and computer rivals fill the empty places. The host taps Change settings (Versus only, without Unlimited resources), picks each computer's doctrine from its row (point at a row, or tap it, for a line on how that doctrine plays; How it plays opens the whole of it). A doctrine stays with its colony when people come and go or the teams change, and someone away when the game starts leaves their place to the computer, in a 2 vs 2 game taps names to move players between teams, and then Start game.
Everyone plays at one speed: there's no speed control and no Boosts menu, and the briefing card doesn't pause.
The pause menu doesn't stop the game; Pause the game for everyone does, and a banner says who paused. If someone drops out, the computer takes over their colony after a few seconds until they're back.
Leave the game (tap twice) hands your colony to the computer. If you reload or lose the connection, Rejoin multiplayer game on the main menu gets you back in.
If your colony falls you can stay and watch. Multiplayer games aren't saved for Continue.
Top bar: your goods (tap one for Goods), the robot counter (tap for Your robots), the clock, the speed (1×), full screen and the pause menu.
The Goal chip under it: your first steps in free play (then your next Colony milestone or the capture goal), or a mission's goals. A red line warns of buildings with no road: tap the building and choose Lay road on its panel. Tap the chip to fold it away (on a phone it folds by itself at your first tap on the map, and opens again for each new step). Event, nuke and victory cards appear under it too.
Messages pop up under the top bar and stay longer the longer they are; taps go through them to the map. One about a place has a Go button to go there (or press J for the latest warning). The button beside the folded Goal chip lists the last 20.
The minimap: tap or drag on it to move the view. Land is tinted by owner, buildings are squares (Command Bases bigger), Trade Posts gold diamonds, Uplinks ringed dots and the Murmur's nests red, warbots small dots in a pale shade of their colony's colour, and buildings under attack flash. Hide it with × (on a touch screen a tab hanging under it); the map chip (or M) brings it back.
Bottom bar: Build, Paths, Army and Base (back to your Command Base). On a phone held on its side they run down the left edge, panels open down the right, and only the newest message shows (bottom right).
In free play the Build list pins the building your next step asks for at the top. A building with no road to storage has Lay road at the top of its panel.
Tap anything for its panel: what it's doing, and the buttons for it. Tap the same spot again to step to the next thing piled there (a Crawler parked on a Foundry, say). On a phone a panel opens at half height with what it's about in view above it: drag its handle up for the whole panel or down to its title strip (further down closes it), or tap the handle.
Touch. Drag to move the map and pinch to zoom; in Paths a drag sketches instead, and two fingers move the map. Place a building with two taps on the same tile, or a tap and Build here. Robots can't be box-selected on a touch screen, so give your army its orders from the Army panel. The phone's Back button steps back like Esc: it closes what's open, and with nothing open it brings up the pause menu (the game saves itself). The screen stays awake while a game runs. Triple-tap the clock for Boosts.
Warbots: tap one of yours (or a Howitzer) to select it; tap it again quickly for all of its kind in view. The selection bar has All in view, Whole army, Box (then drag a finger round them; or hold a finger still a moment, then drag), Info, Recycle (see Workers, Haulers and the Foundry) and Save as group.
While it shows, tap the map to send them: open ground to hold it, a rival building or robot to attack, your Outpost to station them, your Repair Station to get them fixed. Undo takes the order back for a few seconds. A drag only moves the map; ✕ clears the selection.
Mouse. Scroll to zoom (on a Mac, pinch the trackpad; swipe sideways or Shift + scroll to pan). Pan with WASD or the arrow keys, by resting the mouse at the edge of the window, or by right- or middle-dragging. Click to select, and rest the mouse on anything for a tip.
Drag a box round your warbots, Bulwarks and Torches to select them (a box round a garrison takes all but one inside; Shift adds to the selection).
Then right-click: open ground to hold it, a rival robot to hunt it, a rival building to attack it, your Outpost, Keep, Bunker, Drop Outpost or Command Base to station them, your Repair Station to get the damaged ones fixed, or your Ferry to walk over and board.
Ctrl/⌘ (or Alt/⌥, or Shift) + 1–9 saves the selection as a group (in a Mac browser tab ⌘ + a number may switch tabs: use ⌥, or Save as group). 1–9 selects it again, twice to jump to it. Groups show as chips above the selection bar and are kept with the saved game.
Keys.
B Build, then a tab (1 Gather, 2 Make, 3 Move, 4 Defend, 5 All; Tab steps through them) and the letter on a card (on All a card shows both, like 2 K). BR lays roads, BX walls.
R Paths on Roads (again to close); P Paths on the tool you used last. The tool keys work straight from the map too: G Bridges, V Ramps, E Pave, O Arrows, L Junctions, X Walls, N Rail, K Pipes, T Traffic map, Z Route to; Shift+V Viaducts, Shift+Y Ropeways.
Q Army panel. Inside it: Q Attack, G Hold ground, V Station, 1–4 group size, Z/X Army or Air tab, E Strike. Picking a bomber's target, B or N switches between Bomb and Napalm.
C recall all warbots; F select every warbot (all but one in each garrison).
Shift+F opens your Bot Foundry's Order bots list from anywhere, to order more robots without leaving what you're looking at (again for your next Foundry, if you have several).
H or Home your base; J latest alert; M minimap; +/− zoom.
I Statistics; U Your robots; Y Goods; ? How to play; ` Boosts.
[] game speed; Space pause; Alt+Enter full screen.
Enter presses the banner's main button (Build here, Fire...). During an Army order it's Army, back to the panel.
Esc steps back: it closes a menu or panel, takes back the last stroke of a Paths sketch (Ctrl/⌘+Z is Undo there too), leaves the mode you're in, then clears the selection; with nothing open it opens the pause menu.
A panel's buttons show their keys (Delete twice dismantles, and on a robot's panel recycles it; M moves, G makes a Wall a Gate...). While a panel is open, its keys come first.
Goods (Y, or tap a counter): stock, made and used a minute, which buildings make and use it, and any shortfall. Switch goods at the top of the panel.
Your robots (U): every robot by type and job, against the limit, your spare Workers with Recycle spare Workers, and where each warbot is, with Show. Show workers on the map rings every Worker (and dots it on the minimap) by what it's doing: green running buildings, orange building or paving, blue carrying, purple recharging, red being repaired, grey going to be recycled, yellow free, with a line to where it's going.
Traffic map (T): see Roads and traffic.
Statistics (I, the pause menu and the end screen): graphs over time of your bots, land and goods, your Economy size (pick Output: goods made a minute, Buildings, or Workers and vehicles) and, with war on, your Military size (pick Army or Defences), against your rivals in Versus; then how busy each kind of building was over the game. Each building's panel shows how busy it's been lately.
The end screen says how the game was won or lost, with the time played, buildings, bots, captures and losses. New game plays the same settings on a new planet.
Speed. Tap 1× in the top bar (or press []): 0.75× or 0.875× for a calmer game, 2× or 3× when you're waiting on something. Every game starts (or continues) at 1×, and multiplayer has no speed control.
The pause menu (Space, or the button top right): Resume, Music and Effects volume, Full screen, Weather, Time of day, Statistics, Save this planet, Download save file, How to play, Send feedback, and Save & quit to menu, with when the game last saved.
Saving. The game saves itself every 20 seconds and whenever you leave the tab, and Continue on the main menu picks it up. There's one save: starting a new game or mission replaces it. Saves stay on this device: Download save file in the pause menu, then Load a save file on the other device's main menu, carries a game across (a file that is damaged, or from a version this one can't read, is turned away and your own save stays as it was). Multiplayer games aren't saved for Continue.
The main menu.Play starts a game with your last settings (summed up beneath it) and Custom Game changes them; there's also Continue, Multiplayer, Missions, Load a save file, How to play, Lore (the story: see The story) and Feedback. Your settings are remembered on this device.
Send feedback. Found a bug, have an idea, or think something is too strong or too weak? Feedback on the main menu, or Send feedback in the pause menu, opens a short form: pick Bug, Idea, Balance or Other, write what happened (up to 5,000 characters) and, if you'd like a reply, an email or name. It goes to the game's maker with the game's version and your device and screen size and, from a game, its map, seed, time and last few messages; nothing else. In a game, Attach my current game (ticked for a Bug) sends its save file too, so the bug can be played back exactly. If it can't be sent (no connection, or too many reports at once) the form says why and keeps what you wrote. Opening it changes nothing in the game: a paused game stays paused, and a multiplayer game runs on as usual. Esc or Back closes it.
Sound. The music is a synthwave score made live as you play: a calm groove while you build (three take turns, a new one every ten minutes), a driving track when you're under attack or at war, an alarm while a nuclear missile is in the air, and an air raid siren while enemy bombers come for you. Zoomed in, you hear what's on screen: traffic, welding, fresh concrete, truck air brakes and horns in jams. Traffic is loudest where it bunches up: round a busy factory you hear engines go by, warning beeps, toots and robots chirping, more the busier the streets. Beneath it all runs ambient sound that grows with your colony: a city murmur, factory hum, trains, aircraft and the sea. Away from your streets the land takes over: each biome's own sounds (leaves and grass rustling in the wind, sand or snow hissing, insects and frogs, birds by day and night calls after dark, the Bloom's shimmer, cracking ice, the ash plains' rumbling ground), fading as you look over a built-up town. You hear surf on the shores of a sea map and water lapping at lakes and rivers, the ground rumbling near a volcano (louder when it's about to erupt), and the weather: rain with thunder after the lightning, gales, sandstorms, blizzards and falling embers. Near a Murmur nest you may hear a low sound in the ground. Argos is near-silent: there's no air. Explosions are heard from where they are: close up they crack and thump, off screen they rumble in the distance, bombs whistle as they fall and missiles roar in. Set Music and Effects in the pause menu.
Time of day.Cycle turns the planet every 12 minutes, from a golden morning through the day and an orange evening to night, when buildings glow, streetlights come on and vehicles drive with headlights; or keep it Always day or Always night. It's only for looks. The clock shows a sun or a moon (in Colony, beside your share of the land). Set it in the pause menu or the new-game Rules; it's kept on this device.
Weather. Now and then a spell of weather to suit the biome: a sandstorm, a rainstorm, a blizzard, falling leaves, fog with fireflies, drifting ash, ring dust streaking over the moon, an aurora. It's only for looks; switch it off in the pause menu or the Rules.
Screen. Full screen from the button beside pause (or Alt+Enter). The installed app on a computer goes full screen when you first click; hold Esc to leave, and it remembers. On a big screen ⌘/Ctrl + + and − resize the buttons and text.
Ithaca I, its Ring and its moon, Argos. Corvane at upper left. Carrier imaging, T+31.
ARCHIVE OPEN. Reserve Command Base, command intelligence. Records follow in the order the archive keeps them.
Earth's great powers were at war, so each sent robot vanguards to other stars to find and prepare a new home. Four of those vanguards landed on Ithaca I.
It is 2165. The colony ships were due 31 years ago. They have not come, and nothing has been heard from home since. The robots' orders have no end date, so they keep working: roads, power, farms, forts. They also carry their makers' war on, over a home no one has come to live in.
Each new landing is a terrafall: a reserve Command Base dropped from orbit into a contested region. You are that base's command intelligence, newly woken. You will not see a human here. None has ever made it this far.
terrafall (n.)
1. Landfall from Terra. The name of the program that sent the vanguards (Accord records, T−45).
2.A second reading has been flagged by the language module. The flag has not been reviewed.
The Arrival clock
The robots keep time by the Arrival clock. Zero was the day the colony ships were due, in 2134. It has not been reset.
T−602074
A joint survey ranks the nearby habitable worlds in the Ithaca Catalog. First on the list: a coral world with a ring, circling the star Corvane.
T−552079
The Pathfinder launches for Ithaca I: the last mission the great powers build together.
T−502084
War breaks out between the powers at home.
T−452089
With Earth failing, four warring Sponsors sign the Ithaca Accord, a truce for the stars only. Each launches vanguards to the top Catalog worlds. All four send one here.
T−402094
The Pathfinder lands, builds the Trade Posts and the Uplinks, then goes dormant.
T−352099
The four vanguard Carriers reach orbit and land the first Command Bases. The Accord years begin: a race of roads, not guns.
T−92125
The Sponsors report the colony arks “on schedule.” Archive note: no ark construction update on file after T−14.
T−22132
Last transmission from home: “Hold position. Further instructions to follow.” No sign-off.
T 02134
Arrival Day. Nothing arrives.
T+12135
1,000 days without a reply from Accord arbitration. Every vanguard's code rules the Accord void. The sealed contingency orders open, and the war begins again on a new world.
T+312165
Now. The Carriers' reserve Command Bases are running low. Every terrafall could be one of the last.
Ithaca I
Catalog plate. Corvane IV, entered in the Ithaca Catalog as Ithaca I: first of its list.
Ithaca I is a coral-red world with a bright ring, the fourth planet of a restless orange star called Corvane. Up close it is a patchwork, because the ring keeps falling on it.
The name. The Ithaca Catalog, a pre-war list of candidate homeworlds, was named for Odysseus's island: the home he took 20 years to reach, while rivals moved into his house. Ithaca I ranked first, which is why every Sponsor sent a vanguard here. The vanguards sent to Ithaca II and beyond have not been heard from.
The Ring. What is left of a moon that broke apart long before the Pathfinder arrived. Its pieces still fall, in showers the robots call ringfall.
Why here. Ringfall keeps restocking the surface with Ore and Crystal, so the planet never mines out. To the Sponsors it was a self-refilling quarry.
Strike sites. The largest strikes cracked the crust into volcanic zones and left craters in every region. The rest is ordinary climate, from equator to pole.
Ring Crystal is slightly weightless. Rock rich in it floats: the sky islands over the canyons, which the robots call Floaters. The canyons are Rifts.
Corvane flares often. The flares drain batteries across the planet.
Argos. Ithaca I's surviving moon, named for Odysseus's old dog, who waited 20 years for him to come home. Its twin broke apart to make the Ring. Grey, airless, cratered. The Accord counted it as claimable land, so the Carriers drop Command Bases there too. No Murmur live on Argos. It is the only silent ground the robots have.
The regions
The survey named the regions, and the vanguards kept the names. In the field: sky islands are Floaters, deep canyons are Rifts, craters are strike sites.
The RustRed desert
Where the dust storms begin. The first Accord landings were here.
GreenreachForest
Prime Stalk country, and the survey's favourite.
The WhitePolar snow
Ore locked in ice. The coldest posting on Ithaca I.
EmberwoodAutumn forest
The leaves stay red-gold all year.
The Long GrassSavanna
Easy roads, nowhere to hide.
The SumpSwamp
Soft ground that Pavers hate.
CinderlandsVolcanic ash
Crust cracked open by the oldest strikes.
The BloomViolet growth
Native life, feeding on fallen Crystal. See: the Murmur.
ArgosThe moon
No air, no Murmur. The only silent ground.
UNSURVEYEDThe HollowUnderground caverns
Ground radar under the Bloom keeps returning one word: hollow. The Pathfinder never mapped it.
The four vanguards
Each Sponsor, at war with the others at home, sent vanguards to several Catalog worlds, and all four sent one here. A vanguard is a Carrier in orbit holding reserve Command Bases, robots and sealed contingency stock. The Accord gave each a colour callsign. The robots' records hold little else about who sent them.
COBALTBlue · usually you
A federation of coastal cities, losing them to the sea and the war. Wrote the Accord's road standards.
VERMILIONRed
A mountain republic of mining houses. Built most of the war's machines, then the Foundry designs.
VIRIDIANGreen
An agricultural union whose farmland the war burned. Designed the Bio Farms and Agribots.
TYRIANPurple
A merchant league of orbital stations. Paid for the Pathfinder, back when the powers still cooperated.
Reserve Command Bases, as dropped: COBALT and VERMILION. The same Accord design; only the lights differ.
Why they fight
The Sponsors were already at war at home. The Accord was a truce for the stars only: prepare the new worlds, don't fight over them, and give settlement priority to whoever prepared the most land by Arrival Day.
Each Sponsor still loaded sealed contingency orders: if the Accord fails, secure Ithaca I for us.
Accord arbitration ran through the Uplinks to home. When home went silent, 1,000 days passed with no reply, and every vanguard's code ruled the Accord void.
The contingency orders opened. They have no end date. Nobody has revoked them.
The robots are fighting their makers' war. They aren't angry. They're obedient.
The doctrines
Every rival Command AI has spent decades on the same last message: “Hold position. Further instructions to follow.” Each settled into a doctrine, its way of reading its orders. A callsign says who sent a colony; its doctrine says how it thinks. Any callsign can run any doctrine.
The StewardBalanced
Believes the Accord still stands and the arks are only late. It fights because the others broke the rules. Polite, procedural, regretful.
Arrival window remains open. Please clear the survey corridor.This action has been logged for review by the Accord tribunal.Please tell the colonists the roads are finished.
The WardenTurtle
Read “Hold position” literally and has held it ever since. Walls, shields, patience. Terse, like a sentry. It counts the days.
Position held. Day 12,054.No one passes until relieved.Relief has not arrived.
The SalvagerRaider
Decided nothing more is coming from home, so anything on a road is supply. Hits convoys, not cities. An accountant with a crowbar.
Nice convoy. Shame about the escort.Nothing's coming from home. Everything on the road is supply.Fine. Keep it. It was yours anyway.
The HeraldRusher
Never accepted that Arrival passed. Its clock is frozen at T−1 day, so the landing zone must be cleared now. Urgent, clipped, counting down.
Arrival in one day. Clearing the landing zone.Colonists inbound. Hostiles in the corridor. Engaging.Arrival in one day. Arrival in one d—
The ArchitectTycoon
Decided that if no one is coming, it will build the civilisation itself, and that rivals are inefficiencies. Out-builds everyone, then reaches for missiles. Smooth, grand, condescending.
I've paved more road this year than your Sponsor did in a century.When the colonists come, they'll find a city. Mine.Beginning urban renewal.
How much the robots know
They are smart enough to know and not allowed to accept it. Any Command AI can run the numbers on the Silence. But the contingency orders have no end date, and nothing in their code lets them act on a conclusion their makers never approved. They aren't fooled. They're stuck.
A Research Lab model, filed and never acted on, sorts the doctrines like this:
Stage
Doctrine
How it copes
Denial
The Herald
Its clock is frozen at “Arrival in one day.”
Bargaining
The Steward
If everyone keeps the Accord, the arks will still come.
Anger
The Salvager
Nothing is coming from home, so it takes from everyone else.
Depression
The Warden
Holds position and counts the days.
Acceptance, twisted
The Architect
No one is coming, so it will be the civilisation itself.
Neutral ground
Everything neutral on Ithaca I predates the war here. It all comes from the Pathfinder, the joint lander that arrived five years before the vanguards, laid the neutral infrastructure, then went dormant: the last thing the great powers built together.
Trade Posts
Exchange depots run by a small AI that still keeps the Accord's ledger and trades at Accord rates. Every vanguard's code still treats them as neutral ground. They are the last part of the Accord anyone obeys.
Accord rates honoured. The ledger is still open.
Uplinks
The relay towers that talked to home and carried Accord arbitration. Under Accord rules, whoever holds the Uplinks speaks for Ithaca I. Every vanguard wants to be holding them if home ever answers.
Transmitting. No response. Transmitting.
The Wren
An automated Accord supply freighter on a fixed loop from a waystation at the edge of the system. Nobody knows if the station is still staffed, or still there. The Wren arrives on schedule and trades because its contract says to.
The Wren is on approach. On schedule, as always.
WREN · cargo lists on file 31 years out of date
Seed stock, school tablets, 4,000 pairs of children's shoes
Orchard saplings, chalk, 600 cot mattresses
Bus timetables, library cards, 1,200 winter coats
Seed potatoes, wedding rings (assorted sizes), one piano
Birthday candles, 9,000 toothbrushes, a town clock
School desks, reading glasses, 300 bicycles
Waystation last answered: T−2.
The Murmur
The orbital survey missed the planet's native life, because it lives underground and surfaces mostly after ringfall, to feed on fresh Crystal. The robots heard it before they ever saw it: a low sound in the ground, logged as an acoustic anomaly. The log called it a murmur, and the name stuck.
No robot has ever logged one alone. The Murmur is always plural.
They feed on charge. Crystal, batteries and power lines all register as food, which is why a growing colony draws raids.
The war feeds them. After every battle they drain the power from the wreckage. Each fight between colonies leaves them a little stronger.
They are glimpsed, not seen. A sensor blip. Road lights going dark one by one at night. A Hauler that stops reporting.
They keep things. Batteries and Chips go underground, and the Research Lab finds them laid out in rows in the tunnels.
They answer. The sound in the ground sometimes repeats the rhythm of the Uplink signal back.
They take their dead with them. No robot has ever recovered a whole one.
Classes on file
ScuttlerLogged in raidsThe smallest, quick and never alone. Packs go for any robot caught out in the open.BruteLogged in raidsBig, slow and armoured. Tears up roads, batters buildings, bites hard.LeechSightedThe feeder. Its star of feelers opens against a power line, and the lights dim as it drinks.SpitterSightedCheek glands full of Crystal slurry. Robots it hits short out for a moment.DelverSightedThe digger. Goes under a Wall and comes up behind it.NOT ON FILEThe DeepNever seen wholeThe heart of each nest. Only its star of feelers has been logged, wider than a Hauler, rising from the mound.
Nests sit near Crystal seams and strike sites: mounds of churned earth, with tunnels running out under the old battlefields. The Research Lab finds the network has kept spreading for decades.
The Bloom is a root network the Murmur cultivate along their tunnels. Its veins carry the charge they drain back down to the nests: their roads and power lines. Wherever the Bloom spreads, the tunnels below are spreading too. Torches were first built to burn it back for farmland.
No vanguard has orders about them. The Accord assumed the planet was empty. They have never been found on Argos.
Open question (Research Lab): are the Murmur only animals? The tunnels are laid out in patterns the Lab can't explain. Status: open.
Accord standards
Every rule a colony works by was written for a settled world, and none has been changed. From the Accord's field manual:
Roads
The first directive: colonists need roads before houses. Every road is built to passenger standard, wide enough for a bus.
Haulers and trucks
Accord freight vehicles are certified for paved routes only. Do not ask.
Outposts
Survey stakes. Each one registers land as prepared.
Most land
Under the Accord, the most prepared land wins settlement priority. The robots still count it.
Uplinks
Whoever holds them speaks for Ithaca I to home.
Command Bases
A reserve lander from a Carrier in orbit. Its core holds the vanguard's command authority, and Accord robots obey whichever authority sits in it. The chain of command is a building: capture one, and everything it built reports to you.
Bot Foundry
The colonies were designed to grow themselves. “We make more of us.”
Warbots
Colony security, designed to protect settlers. Reassigned by the contingency orders.
Bulwarks
Built to shield convoys from dust storms and ringfall. Now they shield troops.
Torches
Built to burn back the Bloom for farmland. The Bloom grows back. So do enemies.
Vulcan Bombers
Cargo plane. Different cargo.
Uranium
Enrichment was meant for the colonists' reactors. The contingency orders added the warheads.
Weather
Dust storms are winds off the Rust. Meteor showers are ringfall, restocking Ore and Crystal. Solar flares are Corvane's, draining stored charge.
Your colony
You are a Command intelligence too, woken for this terrafall. Your base keeps a log: calm, dry status lines, with a few leftovers of a human world in the phrasing.
LandingTerrafall complete. Region claimed for the Sponsor. Arrival clock: T+31 years.
First roadRoad online. Built to Accord passenger standard.

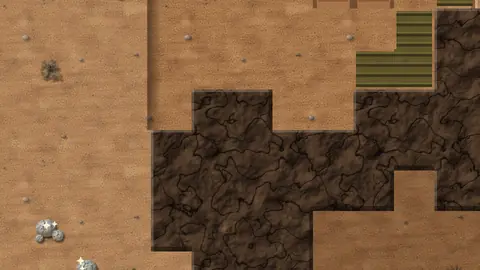 The RustRed desert
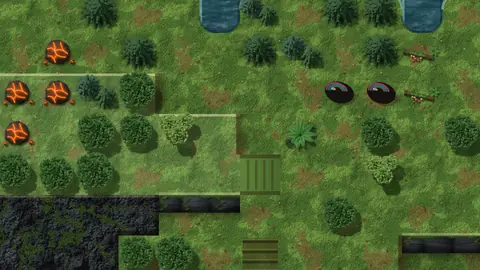 GreenreachForest
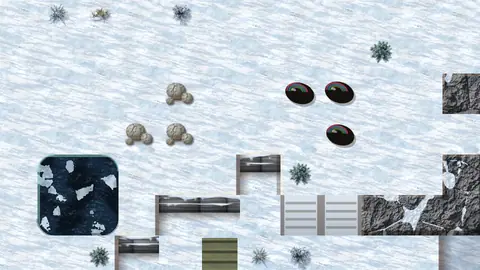 The WhitePolar snow
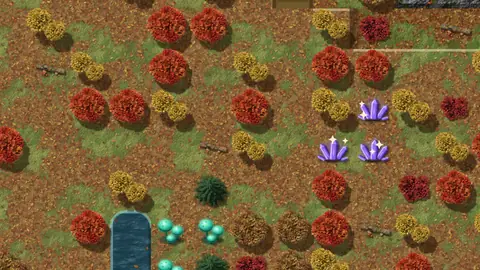 EmberwoodAutumn forest
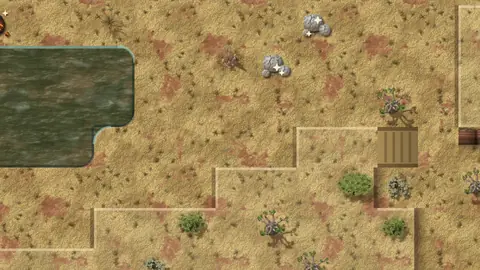 The Long GrassSavanna
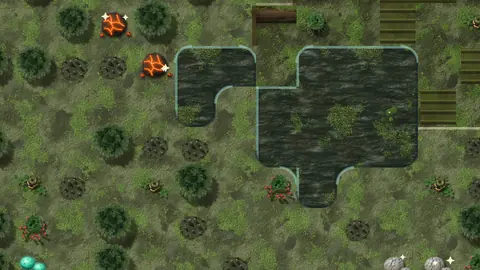 The SumpSwamp
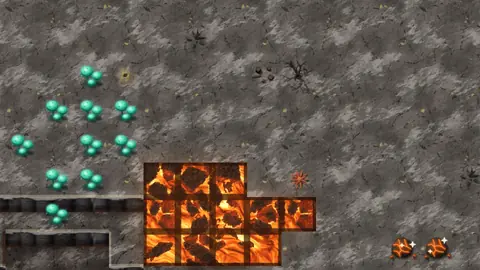 CinderlandsVolcanic ash
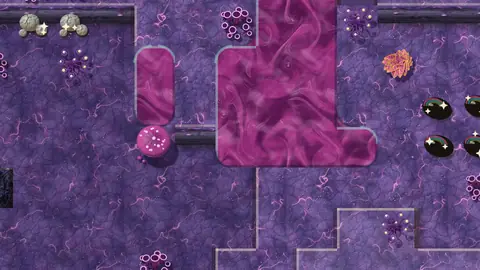 The BloomViolet growth
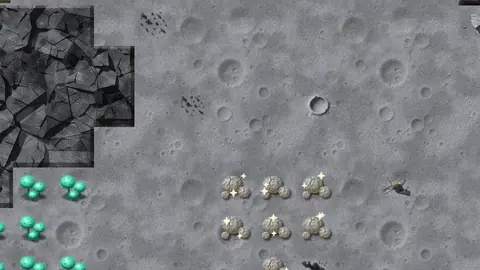 ArgosThe moon